Why We Eat Spaceships with Tails - sprouting legumes and grains is worth it!

There is only so much time in a day, why on earth is sprouting legumes, grains or seeds a good idea?

Let me make myself perfectly clear. Sprouting takes less than 4 minutes of your time from start to finish. That 4 minutes will pay you back exponentially.

Exponential improvement in the health of you and your tribe allowing you to live and be your best!  A promise about soaking stuff in water first?  Yes indeed!

Sprouting is something I started doing to help our 15 year old daughter as she battles c diff colitis Remember the Big MAC diet post?

Microbiota Accessible Carbohydrates….these are the Big MAC’s we LOVE at our house. I add sprouted legumes to EVERYTHING and in so doing help our daughters gut heal while improving our own health.

They aren't just good for her, they are good for all of us! Our uber picky 8 year old almost died and refused to eat the "tail" the first time he saw sprouted lentils added to a burrito.  I laughed and told him, "dude, you need to eat the whole spaceship with the tail." Sold.

  • Legumes are packed with the fiber the critters in our intestines (gut microbiome) LOVE to eat. The equation is simple. High fiber foods = food for intestinal bacteria = stronger microbiome.
  • Fiber is what the critters in your gut eat. Well-fed gut critters = happy, healthy gut critters. Check.
  • Fiber keeps you full longer. Check.
  • Fiber saves you time sitting on the porcelain throne. Check.
  • Sprouting legumes prior to eating helps make them easier to digest (shhh this means less gas). Check.
  • Cheap plant based protein - 1/2 cup cooked lentils have 8 grams of protein. Double Check.
  • Dry legumes are super cheap. Less than $1 a pound at any grocery store. Last time I was at Costco, organic chicken was about $6 a pound. You have math skills too. Check.

Plenty of reasons to want to add legumes, grains and seeds to your diet but sprouting them first? Yes!!!

Sprouting – DISCLAIMER… if they smell weird, are slimy or moldy….DO NOT EAT THEM!!!!

If you have a mason jar you can do this. Nothing technical, nothing wacky.

Benefits of Sprouting

Complex carbohydrates are broken down into easier to digest carbohydrates = less gas.

Sprouting also allows for our body to absorb more nutrients = more vitamins and minerals to help the cells in our body fight and be its strongest.

If you are sprouting legumes or grains, they will cook faster. Check

Ever head of alkaline (plant based foods) vs acidic (sugar and heavily processed foods) foods? The more alkaline the better. Guess what, sprouting makes legumes, grains and seeds more alkaline which is SUPER AMAZING for our body!!!

If you are still reading, there is a chance you might try sprouting. Seriously it takes nothing fancy.

Here are the steps to sprout your own goodness:

  • Rinse 1 cup of lentils (legumes, grains or seeds)
  • Place rinsed lentils in a 1 qt mason jar
  • Fill jar to the shoulder with water and let it sit overnight or for about 12 hours
  • Use your fingers and hand as a colander (or cheese cloth secured with a ring) and drain water.
  • Prop jar on a towel at an angle to allow for drainage and air flow.
  • Rinse 2-3 times a day by filling the jar with fresh water and pouring it out again using your fingers and hand or cheesecloth  as a strainer. Continue to prop jar on a towel at an angle. Your sprouts are ready when they have ¼ inch “tails.” (After the overnight soak, it takes until about the end of the second day to get them to sprout.)
  • Place sprouted lentils in a medium saucepan and add water to cover plus an inch or so. Bring to a boil then cover with a lid and simmer for 15-20 min or until tender. Each legume or grain will have a different cooking time BUT it will be faster than a non-sprouted legume or grain.  Freeze extra in zip lock baggies, all ready portioned.

WHERE TO USE SPROUTED grains or legumes –

SALADS, SOUP, CASSEROLES, SCRAMBLED EGGS and add to meat dishes like tacos, shredded bbq. You name it and I will have been accused of adding lentils to it.

They are amazing in everything and with everything!!! There is also a really good chance you can get away with them added to brownies and cookies too. Shhhh!

Sign up so you don't miss a post. Like, follow, pin or comment - I would love to hear your questions so I know what to do to better help you understand easy, awesome ways to improve your health!

Brooke

Amazing Almond Crusted Chicken Nuggets

Chicken nuggets gag me.

Except occasionally from Chick- fil- A, those are tasty – just not great for your body.

Chicken nuggets that are made from pieces and parts and are extruded to special shapes gag me.

They also gag my children, especially when they get a chewy part.  You know what I’m talking about. We call those parts chicken toe nails. Ewwww! It is so nasty to get a bite of chicken with the texture of a toenail blended in.

I have spent the last 3 months revamping how we eat due to the c diff colitis infection our 15 year old is battling.  One of the things we have done is to make sure she gets plenty of healthy sources of protein to help her body heal.

Whenever you are sick, your body needs more protein to repair.

Chicken nuggets are a classic go-to for easy fast and yummy. When they are homemade they do take more time BUT you eliminate the gag factor.

One of our new favorite dinner recipes is a chicken nugget you don’t have to fear because you know where the chicken comes from.

The coating is gluten-free and super delicious.

We love it because it doesn’t call for breadcrumbs. We have almost eliminated all bread from my daughter’s diet - simple highly processed foods (she won’t eat 100% whole wheat bread) make bacteria thrive. We want c diff to die not thrive!

If you are trying to EAT less processed foods, FEWER carbs and more WHOLE FOODS, this recipe is for you! Bonus – it’s super tasty, especially with a slice of fresh squeezed lemon across the top.

Amazing Almond Crusted Chicken Nuggets!

Amazing Almond Crusted Chicken Nuggets!

Awesome Almond Crusted Chicken Nuggets

  • 1 pound chicken tenders or chicken breast (sliced in ¼ inch chunks)
  • 1 cup almond meal (flour) (Costco has the best price I’ve found)
  • 1 cup grated parmesan cheese
  • ¼ tsp smoked paprika
  • Pepper
  • 2 large eggs

Set oven to 375 degrees and line a baking sheet with a silpat or parchment paper.

Combine almond meal, parmesan, paprika and pepper in a small bowl. Beat eggs in separate bowl. Dip chicken pieces in egg then almond mixture and place on prepared baking sheet. Transfer to the oven and bake until golden brown and cooked through, about 15-20 minutes. Remove from oven and top with a squeeze of lemon. It’s like a burst of warm sunshine….so tasty!

Thanks for reading! Give this recipe a try, your body and your taste buds will appreciate it!

Brooke

Registered Dietitian Nutritionist

The Big MAC Diet, Why it will Change YOUR Life and a Thai Recipe!

Oh those golden arches, breakfast all day every day, dollar menu and a scary clown!

What is not to love about all things Mickey D? 

A Big MAC diet - let's learn more! ….drooling, oh yeah baby…duh duh duh da duh I’m lovin’ it!

From the last blog post you learned about the biggest mistake of my life and how it could help you. My reading comprehension error with an antibiotic prescription lead to a serious c diff colitis infection in our 15 year old. Three months later she is still fighting this demon.

Every time we eat we either do something to build our bodies or tear them down. Bite by bite, every day, every meal. We are focusing on doing everything possible to help our daughter heal from the horrible demon inside her.

I haven’t been to a McDonald’s in years so the idea of eating a Big Mac is quite goofy to me. HA! Wrong Big MAC.

This Big MAC diet is actually one that will help your gut heal (a major focus at our house), improve your weight, mood and long-term health. Did you know your gut is linked to so many things?

Big MAC is a term from the book, The Good Gut, by Justin and Erica Sonnenburg. It has been one of my favorite books as I have researched different ideas to help our daughter heal from her intestinal infection.

A MAC is a microbiota accessible carbohydrate. Huh? A carbohydrate that the critters in your gut use for fuel. Giving your gut critters the nutrients they need to thrive will improve your body on so many levels. Duh, duh, duh, duh da….your gut microbiome is lovin’ it!

Think complex carbohydrates: fruit, veggies, legumes and unrefined whole grains. The more diverse your intake, the better it helps the good bacteria in your gut thrive.

These Big MAC’s LOVE fiber and act like a recycling facility, pulling out the good stuff from the goop headed out the back end and it actually improves your health when these critters eat well.

Fiber is not just for binding cholesterol or keeping you for getting plugged up. Fiber fuels those critical microbes in your gut. When they have what they need, they give you what you need.  A happy gut microbiome leads to protection from crud leaking across the gut membrane and into your body. Crud that makes you sick.

Fiber comes from carbohydrates and carbohydrates are not the most popular nutrients of the day. Most foods that come in a package, food handed to you in a paper bag out of a drive through window and almost everything but the outer perimeter of a grocery store is what earned carbohydrates a bad rap.

Heavily processed crap food that tastes delicious, is super cheap and comes in a crinkly wrapper. Those are the carbohydrates that need avoidance.

Fruit, veggies, unrefined whole grains and legumes. EAT these carbohydrates.  Every day, all day to give your gut microbes what they need to thrive and keep you healthy.

This is our favorite new recipe for our big MAC combo meal…it’s SOOOO good!  It’s mild yet flavorful and our pickest picky of all LOVES it! 

THAI RED CURRY SOUP

  • 1 pound chicken (turkey, tofu, etc), sliced in thin bite sized pieces
  • 1 Tbsp coconut oil
  • 1 red bell pepper, diced
  • 1 medium onion, diced
  • 3 cloves minced garlic
  • 1 ½ Tbsp grated ginger (I use a microplaner)
  • 3 Tbsp red curry paste (it’s very mild, you don’t need to be afraid and the Thai Kitchen brand is yummy and easy to find at Walmart, Kroger, Target, etc)
  • 3 – 13.5 ounce cans full fat, unsweetened coconut milk (coconut fat is healthy fat)
  • Juice of 1 lime

Optional veggies: diced carrots, diced sweet potato, mushrooms, zucchini, eggplant, broccoli, cauliflower, zucchini, chard, kale…if you love it…add it!

In a medium sauce pan heat oil on medium, cook chicken until cooked completely through. Add diced pepper and onion. Sauté until soft. Add garlic and ginger and cook until its fragrant (a minute or so). Add curry paste and unsweetened coconut milk; stir until curry paste is fully dissolved. Let simmer for 20 minutes or so for the flavors to merry. Add juice of one lime and top with more deliciousness!

Top with chopped dry roasted peanuts, cilantro, mung bean sprouts and a wedge of lime.

Recipe scales easily depending on how big your crew is. This feeds our family of 5 with delicious leftovers.

Eat Big MAC’s all day, every day. Just get them in the produce section of the grocery store!!

Your gut will thank you, I promise!

Brooke, RDN

The Biggest Mistake of My Life and How It Will Help You

Reading comprehension. The biggest mistake of my life was a reading comprehension error regarding something most of us don’t think twice about.

Antibiotics.

Our oldest is a bright 15 year old with a dust mite allergy that leads to an occasional sinus infection.  Cue the sinus infection just before Thanksgiving. Cue a 10 day course of antibiotics.

“Take 2 in the morning and 2 at night and you will feel better in no time,” I instructed as I handed over the prescription and rushed the kids out the door for several holiday overnighters with family.

A 10 day antibiotic course was accidently taken in 5 days due in part to the hustle and bustle of everything.  I read the instructions too fast and gave her the wrong instructions. She listened all too well.

2 ER visits, 3 InstaCare visits, 2 regular doc visits, 2 GI specialist visits, 10%+ of her body weight lost and her bathroom on quarantine and disinfected only with a 10:1 bleach solution to kill the spores and prevent this highly contagious disease from spreading.

20170210_100522.jpg

Imagine a nuclear bomb going off in your intestines. That is exactly what happened to her gut with an overdose of antibiotics.

Our first InstaCare visit led to my new favorite doctor gently telling me our daughter was very sick and needed to go to the ER. Which ER would we like so they could call ahead and let them know we were coming and would we like an ambulance? 

WHOA. WHAT JUST HAPPENED? We went from stomach ache, cramps and scoots to would we like an ambulance in the course of the 45 minute visit.

Deep breath. Put on brave face. Head to the ER. She was REALLY sick.

Long story short, the overdose led to a party in her gut by a bacteria known as c. diff (clostridium difficile). C diff is commonly in our gut but it is kept in check by the good critters working in the depths below.

The first two rounds of drugs used to treat the c diff failed, meaning severe scoots and cramps returned.  She is currently pounding down a 6 week tapered course of an antibiotic that kills the c diff. Once the taper ends we will pulse it another 3 weeks.

Praying like it’s all in God’s hands yet doing everything in our power to heal her along the way.

Needless to say, hours have been spent digging into learning more about c diff, our gut microbiome and how amazing our guts truly are.

As you can imagine, a few things have changed at our house when it comes to feeding, fueling and repairing our daughter.

Here is a quick rundown of things you could consider if you or yours

needs to rebuild immunity for whatever reason.

Caution: Exceptional long term heath may occur!

  • Carbohydrate only when occurring naturally in milk, fruits (take it easy on fruits for now too, fruit sugar is difficult to digest) veggies or whole grains
  • Minimal amounts of processed or packaged food –not much that comes in a wrapper is very good for your body
  • Avocado
  • Coconut Oil & Olive Oil
  • Sugarlimited to naturally occurring
  • Whole milk – she needs the calories, higher protein content and lower sugar level – if her stomach hurt after consuming dairy I would eliminate it all together but she is tolerating it well and only has one glass a day.
  • Kefir – homemade and purchased from the store (we LOVE the Lifeway brand raspberry and peach). As a fermented food it’s 99% lactose free = no problems digesting it plus it’s packed with probiotics!
  • Prebiotics – need the fiber from produce for fuel which fuels probiotics -  in the form of raw or cooked and all throughout the day to continuously feed the critter below
  • Probiotics – yes, even though she is on an antibiotic (spaced at the mid-point of antibiotic dosingie- 8a and 8p dose = probiotics at 2p) Currently we are using Dr Axe SBO Probiotic – soil based with 50 Billion CFU’s - one capsule with lunch and the other when she comes home from school.
  • Lentils – we call them tiny spaceships…protein and fiber packed amazingness eaten with lunch and dinner by simply adding to whatever the meal (tacos, soup and even pasta). Prebiotics LOVE the fiber in lentils. Happy prebiotics = happy probiotics!
  • Greens – spinach and kale (packed in smoothies)
  • Bone Broth Protein Powder (we are using Dr Axe Vanilla and Pure)
  • Classic Scary Smoothie (70/30 fruit and veggies + homemade kefir) daily
  • Water – plenty of crystal clear amazing water!!!
  • Meditation – we use an app called Calm – outstanding! Used to managed pain, cramps and fear.
  • Less stress – we had to withdraw her from an AP class to decrease homework and stress load from missing so much school (20+ days)
  • Gentle exercise – everyone is happier when they move 

Breakfast Gut Re-Builder Smoothie

  • 1 cup spinach – fiber feeds the prebiotics which feed the probiotics and are one of the most powerful sources of phytonutrients a person can consume
  • 1/3 banana – sweetness and masks the flavor of spinach
  • ¼ cup raspberries, blackberries or blueberries –  fantastic sources of antioxidants, phytonutrients, fiber which are all key in healing the body
  • ½ cup raspberry kefir – probiotic source
  • ¼ - ½  avocado – healthy fat
  • ½ - 1 scoop vanilla bone broth protein powder
  • Water – enough to get the contents of the blender to churn
20170210_100119.jpg


Antibiotics are scary dangerous drugs that are overused and underfeared.  Learn from my mistake and be cautious as you read the directions. Most conditions will resolve without the use of these drugs. Consider that as a primary approach to better health. Your gut microbiome will thank you!

We are approaching 3 months of dealing with this beast and are not out of the woods yet. The light at the end of the tunnel is in sight but this rollercoaster will still have dips and curves. We are thankful the dips and curves are getting easier to handle.

Keep your gut healthy, you have life to live!

Brooke

Easy French Dip Sandwiches FAST FOOD Part 3 of 3

Here is the final blog post in the Fast Food series. You will love it!

School lunch when I was a kid was amazing. Seriously!

Did you ever trade your hamburger for a congo bar or a cup of chocolate pudding? That was me, trading for the sweets. I loved the scratch made rolls, donuts and desserts. The one main dish I never traded and my favorite lunch day of all time – French Dip. This recipe is that lunch from long ago.

We only eat a roast 3-4 times a year. This recipe is worthy of that rare occasion. It is so easy and reminds me of school lunch French Dip from eons ago.

Consider using this recipe over the holidays to free up your time to spend with family and still have an amazing meal that will leave everyone smiling.

Easy Crock Pot French Dip Sandwiches

  • 2- 14.5 oz cans Beef Consommé (it’s next to the Beef Broth and other canned soups)
  • 2-3 pound roast (beef or pork)
  • Buns

Spray slow cooker with non-stick spray, add roast. Pour consommé over roast and set your crockpot to low for 8-11 hours or high 5-7 hours.

Even if your roast is frozen solid, it will take 10-11 hours to cook on high but if it’s in around 7am it will be ready around 6pm. This is usually my method because I forget to defrost the roast in the fridge the night before.

Once roast is ready to fall apart, remove from slow cooker and save extra juice for dipping! With 2 forks, shred roast and serve meat on buns.

The recipe is from Six Sisters Stuff and here is their cute link:

http://www.sixsistersstuff.com/2012/06/slow-cooker-easy-french-dip-sandwiches.html

If you have a smaller family and have plenty of leftovers, remember to use the cupcake liner trick. Freeze in the liners so they are super easy to remove and bag them up for later use.

This is a photo of the leftovers that were getting close to being too old without being eaten. The photo shows French Dip, Taco Soup and Green Chili Chicken with Masa Dumplings. We pull them out when we are in a time crunch and whammo have an excellent meal ready to roll!

Happy Eating!

Brooke

Simple Crock Pot Green Chile Chicken with Masa Dumplings: FAST FOOD Part 2 of 3

Simple Crock Pot Green Chile Chicken with Masa Dumplings

Imagine your busiest day of the week filled with all things nutso where you are stretched as thin as silly putty about to snap. Then add something else to your to-do list. Like eat. Eating isn’t all bad, especially when it’s something fabulous and easy and delicious and good for your team.

Enchilada sauce, chicken, black beans and masa.  BAM! That is it my friends.

Masa? Que Paso? Masa is corn flour used to make corn tortillas and tamales. We LOVE homemade corn tortillas and tamales but again….labor of muy loco love cuz they are a crazy amount of work to make. To be fair to tortillas though, we make them several times a month and those bad boys are so worth the effort! Just not on those days when life is super nuts.

Back to masa and why it is so spectacular. Masa harina is a whole grain and because it comes from corn, it’s gluten free if that matters to you. If you need it gluten free certified make sure it’s on the label (like Bob’s Redmill). Otherwise masa is a cinch to work with and it’s super delicious, its good for you without tasting like liquid alfalfa. Sold right?

You will find it on the bottom shelf at the grocery store in the Hispanic section.

20161022_184213.jpg

We invented these masa dumplings when we had no time to make honest to goodness real homemade corn tortillas, fill them with the chicken and bake…I needed to simplify crazy delicious enchiladas. This recipe does that.

Back to dinner on the craziest day of the week.

FOUR ingredients, whole grain, whole foods….AWESOME!

20161026_172449.jpg

This recipe also has 3 different levels of difficulty based on how much time you have.

Simple Crock Pot Green Chili Chicken with Masa Dumplings

  • 1 28 oz can green chili enchilada sauce
  • ¼ can water added to the green chili enchilada can, swirled around
  • 1 15 oz can black beans, rinsed and drained
  • 1 pound chicken (pork would work too)- I only thaw it in the fridge overnight (when I remember) so it’s still pretty frozen in the morning

Use a crock-pot liner, spray with oil or do nothing at all (that’s how I do it) to the inside of the crock pot. Place enchilada sauce, water, black beans and chicken. Dial crock pot to low and let it go to work while you attack your day. I usually start this meal at 7 am, when I get home at 3 I shred the chicken and add the masa.

***EASY LEVEL ALERT*** need things simpler? Don’t add the extra water, once the chicken has cooked all day, shred it and scoop the shredded chicken into flour tortillas or corn shells. BAM…Dinner ready

***MEDIUM LEVEL ALERT *** If you have an extra hour before dinner add this step:

  • 1 2/3 cups masa (whole grain corn flour used to make tamales – you find it in the Hispanic section)
  • 1 1/4 cup warm water
  • Pinch of salt

Measure masa, add salt and blend. Add water to form dough, similar to biscuit consistency. If it’s a little sticky and wet it’s ok. If it’s so sticky you can’t get it off your fingers add a little more masa. Corn flour has no gluten so you can’t really over mix it with negative consequences.

Scoop golf ball sized globs and pat flat - about ¼ inch thick in the palm of your hand or your fingertips and drop into fully cooked shredded chicken goop in the crock pot. Spread the masa around (we push the layers of masa down with a fork) until all the masa dumplings are submerged. Crank the crockpot to high for one hour and your masterpiece will be inhaled shortly.

Serve atop fresh spinach with a side of tomatoes or summer squash. My kids love to dollop with sour cream.

Muy delicioso!

Brooke

 ***HARDEST LEVEL BASED ON TIME AND ENERGY*** Should you feel super energetic and prefer homemade green Chile tomatillo sauce, this is what I use. We grow tomatillos in the garden and literally have 2 – 5 gallon buckets of tomatillos. I love homegrown, homemade sauce so I freeze it in 4-5 cup portions and use that instead of the cans of enchilada sauce from the store.


Quick Green Chile Tomatillo Sauce

Boil

  • 5 pounds of husked tomatillos
  • 10-12 jalapenos, remove seeds and ribs if you prefer less heat
  • 2 big pinches of salt

Add enough water to cover tomatillos and jalapenos, bring to a boil and boil 10 minutes. Drain in a colander.

In your blender add:

  • 1 bunch cilantro
  • 2 medium onion, course chopped
  • 6 cloves garlic
  • 4 cups chicken broth
  • Salt to taste

Scoop enough cooked tomatillos and jalapenos into the blender to fill about 2/3 the way. Add a cup or two of the broth so things swirl and grind to your smoothness liking.

 Add olive oil to bottom of stock pot, enough to coat.

Pour blender filled with pureed goodness back into the stock pot you used to boil the tomatillos. Blend in batches remaining broth, tomatillos and jalapenos until smooth. Bring to a boil then simmer for 30 min to 1 hour.  Yields 14 cups.

FAST FOOD for Fall Part 1 of 3

Hey You Guys! (Think Goonies!)

Gotcha!  I have been AWOL for awhile BUT have not fallen off my rocker. This post is no ode to the deliciousness of Chick-Fil-A or McDonald's. We rarely eat at those joints because we hate how we feel after we are done noshing. I would bet you feel the same way but still need something as easy and convenient to turn to during those times you are caught in a meal crisis.

Perhaps you would like something easy, fast, affordable and good for you? We all do! Today I share my secret to keeping my family in as much fast food as they want. The only caveat is that this fast food comes from the freezer not a drive through.

The secret to fast food at our house is no longer a secret.  Cupcake tins, silicone cupcake liners (BPA free of course ;) and a freezer bag hold the key to easy, fast, affordable and good for you.

Make the grub, freeze the grub then enjoy your healthy grub when you are in a pickle. This works well for all sizes of families and even college students. Freezing portions of delicious food keeps it from spoiling, keeps you with good for you options and is super convenient.

Fast Food for fall!

Fast Food for fall!

I’ve been freezing food like this since college. I started with spaghetti sauce and this recipe for Calico Beans was the second one to do the cupcake tin routine. Love that silicone cupcake liners have been invented since then!

This recipe is incredibly flexible. It halves or doubles with no problems. It can be made vegan or carnivore. You can even leave out the sugar (I have done that but didn’t like it as much).

Calico Beans

Brown:

  • 5-6 strips of pre-cooked bacon- it will crisp up in the pot, don’t microwave it (optional)
  • 1 medium onion
  • 3 cloves garlic, minced (optional)
  • 1 pound hamburger, ground turkey or ground chicken (optional)

Add:

  • 2 (15 oz) cans kidney beans, drained and rinsed
  • 2 (15 oz) cans pinto beans, drained and rinsed
  • 2 (15 oz) cans great white (northern) beans, NOT drained and rinsed
  • 2 (15 oz) cans black beans, NOT drained and rinsed
  • 1 tbsp Tabasco or Franks Hot Sauce
  • 1 Tbsp dry mustard
  • 1 Tbsp white vinegar
  • ½ cup ketchup
  • ¼ cup sugar
  • 1 tsp salt

Water, add enough to bring the liquid level just below the below the top of the beans. Bring to a boil then turn it down to simmer for 1 – 1 ½ hours (stir occasionally)…if you have less time to let it simmer it’s fine too. It gets tastier as the flavors all meld together.

We eat with saltines, a string cheese and clementine’s or oranges. The vitamin C from the oranges helps your body absorb the iron from the beans and ground meat too.  Maybe that’s weird but it’s perfectly delicious. The kiddos eat it for breakfast, lunch and dinner.

Once it has cooled we scoop the leftovers into the silicone cupcake liners and freeze. Pop them out once they have frozen solid and store in a gallon bag.  FAST FOOD for fall AT YOUR FINGERTIPS!!!

Calico Beans - our fast food!

Calico Beans - our fast food!

Thanks for reading!

Best,

Brooke
Garden Love...for FREE!

As the clutches of an icy cold winter begin to relax it’s time to think about the most important part of your garden. Dirt.

I HEART dirt!

But it’s really more magical than simple dirt. What you need is soil. And soil needs your love. Soil needs to be nurtured as much as the plants, canes and trees that make their home there.

I REALLY HEART soil!

Healthy soil will in turn yield plants that need less water, have better disease resistance and simply produce better. Every micro farmers dream right!?!

The best bang for your effort will come as you evolve your dirt to soil.

And it’s easy.  And you already paid for it.

EASY and FREE.

Do you pack a banana in your lunch? How about an apple? That broccoli stem you cut the florets from for dinner last night? Onion skin, garlic skin, winter squash skin too?

Inedible for us but guess who craves this goodness? Your soil.

Alas, ALL of your fruit and veggie waste is not waste.

These scraps generated from everyday living generate an opportunity to do something spectacular for your soil.

Ummm, my soil is still frozen or so soupy it’s a bad idea to venture into it. What am I supposed to do?

Simple.

PHASE 1

  1. Designate a container - Costco sized cottage cheese bin, plastic ice cream pail or a fancy stainless steel version

  2. Place container next to your sink so it’s not forgotten

  3. Place inedible fruit and veggie scraps in bin -banana peels, apple cores, strawberry tops, pineapple rind, mushy inedible grapes and stems, potato skins, green pepper innards, broccoli and cauliflower inedibles, carrot skins AND anything that has done turned (cue Mater’s voice) from your crisper into your awesomeness bin.

  4. When your bin is full or has a special stank to it it’s time for phase 2.

  5. Grains are welcome in the bin too

  6. DO NOT save meat or oil to compost. It attracts vermin = no Bueno.

PHASE 2

  1. Place soil booster in a 5 gallon bucket on your back porch and wait for spring.

PHASE 3

  1. Simply dig a trough and dump the contents from your collection into the trough, cover with soil and wait a few weeks.

This method works just the same if you use raised beds AND you can even just place a shovel full of kitchen waste in the soil around your favorite plants.  FYI - roses LOVE banana peels!

Most things will be decomposed within a few weeks. Pineapple tops seem to take the longest to break down in my soil but eventually they do. 

What is left behind?  Enriched happy soil ready to do its best.

We have filled 3 buckets so far this winter. They do freeze and thaw but they don’t stink. Occasionally our curious magpie buddies come along and find something they think they need. If you have critters that may think these treats are for them simply cover with a screen and a brick to keep them out.

My kids and even hubby have been trained to bring apple cores, orange peels and banana peels back home in the empty lunch containers.

And it won’t cost you a single extra penny AND you offset that waste from ending up in a burn plant or landfill.

Pat yourself on the back. Mother Earth thanks you too!

Happy Collecting!

Brooke
.....If you loved what you read and would like more subscribe below. I won't bombard you with junk, neither of us has time for that. 2-4 posts a month to make you smile, share exceptional ideas, and promote healthier balanced eating!
3 Reasons to Consider Giving This Critter A Second Thought

For those who love all things spooky  and creepy crawly, this is the perfect time of year to suggest this creature receive a moment in the spotlight.

Instead of screaming, laughing and running away heroically as you escape the clutches Halloween spook, read on. You will be surprised.

This critter is something no one wants to give a second thought too. Eeeeewwww is about as far as you have been...until today.

Maggots. Fly larvae are really pretty awesome…keep reading, I promise it's nifty

Food Chain

Think about it. These beasts decompose things none of us even want to look at. The rotten raccoon nestled on the curb, gushy, soggy plant material and piles of well…poo.

Ever hike where pet owners think they don’t need to pick up after their amazing four legged friends?

Swarms of flies are maddening BUT given enough time flies that lay their eggs in those mounds of yuck will have offspring that will decrease the size of the pile.

Forensic Entomology

Yep, maggots help forensic scientists. Flies will lay between 200-500 eggs on a dead body preferring eye sockets, nostrils and a gaping mouth.

Within 3 days maggots will hatch and go to town eating the decomposing flesh

Nasty, BUT the stage these bugs are found helps determine the time of death for the victim, providing evidence for investigations.  

Medical Maggots

Not only do they eat rotting flesh in carrion on the side of the road but they eat it off people too.

Disinfected maggots are used to clean out necrotic (dead) tissue within wounds – think ulcers and abscesses.

These voracious creatures will eat 5 times their weight in only 2 days. Consuming only the dead flesh they leave the live flesh alone. Their saliva is also known to have antibiotic properties. 

Cultures have used maggots for eons to do just that. Clean out wounds to increase chances of survival.

Medical maggots have been approved for use since 2004 by the US Food and Drug Administration.

If the mere mention of medical maggots doesn’t make you want to hurl, you can even watch them go to work on YouTube, search ‘medical maggots’. You’re welcome.

Maggots have a rotten reputation as they are the larvae of flies and flies are gross because they love all things we deem disgusting. Perhaps like bats, they need a second chance too.

Happy Thursday!

Brooke

Feed Your Sweet Tooth

Confession. I LOVE sweets. Especially chocolate. It's a daily battle how much I do or do not enjoy each and every day. Perhaps you are familiar with this battle.

I've never really been on a "diet" but realized how much sugar I actually ate when I went on "No Sweets Diet" for 21 days a few months ago.

I made up my own rules and eliminated all forms of refined sugar, candy, ice cream and baked sweets. My only sweet exceptions were real maple syrup and honey. I lost 3 pounds in 3 weeks which means I was eating waaay too much, too often.

It would be a bald face lie to imply that we shudder, run and hide when sugar is present.

Every Sunday we have dinner with my family. Guess what our family is in charge of bringing?

Dessert.

Surprised aren't you?

We LOVE our sweets and inhale faster than a Kirby vacuum slurping up the deeply hidden crud in carpet.

However, I do try to make things healthier with whole grain flours, less sugar and healthy fats and oils.

This recipe today is a blend of demonic white flour and whole grain. It even uses a jar of carmel. We love it and succumb to the 80/20 approach.

Make amazing choices 80% of the time, 20% of the time it's ok to enjoy something otherwise forbidden. It's keeping the 20% of the time under control that is challenging.

Today's treat is Gooey Oatmeal Carmelitas.

OATMEAL. CARMEL. CHOCOLATE and half the pan with NUTS for those of us that love them.

I've been madly in love with these treats since I received one at a Christmas Cookie Exchange years ago.

Sink your teeth into these babies you won't be disappointed.


Gooey Oatmeal Carmelitas

Crust

  • 1 cup white flour
  • 3/4 cup whole wheat flour
  • 2 cups oatmeal
  • 1 cup brown sugar
  • 1 cup butter (softened)
  • 1/2 tsp salt

Topping

  • 1 (12.5 or 14 oz jar) caramel ice cream topping
  • 3 Tbsp flour (white or whole wheat)
  • 1 cup semi-sweet chocolate chips
  • 1 cup chopped nuts

Preheat oven to 350 degrees. Grease a 9x13 pan. Combine all crust ingredients and mix until crumbly ( I use my stand mixer). Reserve 2 cups of crust mixture. Press remaining crust ingredients into the prepared pan. Bake at 350 for 10 minutes. Combine caramel topping and flour in a small bowl, mix well. Remove crust from the oven, sprinkle evenly with chocolate chips and nuts. Drizzle with caramel (keep it at least 1/2 inch from the edge for easier pan cleanup). Sprinkle reserved crumb mixture on top. Bake for 18-22 minutes or until golden brown. Cool one hour or until completely cooled. Cut bars when completely set.

Sink your teeth into awesome choices 80% of the time - fruits, veggies, whole grains and tons of water. The other 20%, enjoy the treats you eat. I'm old enough now to know what is worth the calories and not worth the calories. Enjoy what is worth the calories.

Happy Baking!

Brooke


Whole Grain Pumpkin Spice Pancakes

October first and officially all things pumpkin spice have bombarded our lives.

Including this blog post.

This recipe is one we have used for a few years and it’s very fitting to share it during pumpkin spice season.

Hard to imagine but these pancakes are NOT dense bricks of gut wrenching pain. They are puffy yet filling and undeniably spectacular.

Pumpkin (code for squash/veggie) is chock full of antioxidants, phytochemicals and fiber to help you from the inside out.

Squashing (hahaha) free radicals and keeping your cells stronger and healthier to help you attack each day the way you see fit.  It doesn’t hurt that they have a decent amount of fiber to help keep things moving along the way mother nature intended.

Even in the midst of anti-wheat rhetoric we still eat wheat.

Why? Why? Why? Why? Why?

  1. we don’t have celiac or wheat intolerance/allergies
  2. wheat based foods are less expensive than their gluten free cousins
  3. wheat is a terrible horrible no good very bad thing when it’s heavily processed white flour  because it’s usually combined with high fructose corn syrup, artificial colors and no redeeming health benefits – think Fruit Loops.
  4. WHOLE grains are amazing as they contain naturally occurring phytonutrients, vitamins and minerals, fiber and healthy fats.
  5. repeated studies show consumption of whole grains will REDUCE your risk of STROKE, HEART DISEASE and make it easier to MAINTAIN YOUR WEIGHT

Whole Grain Pumpkin Spice Pancakes

  • 2 cups whole wheat flour (white whole wheat works great too)

  • ¼ cup sugar (you could probably eliminate it all due to syrup being poured on top)

  • ½ tsp salt

  • 2 tsp baking powder

  • 2 tsp baking soda

  • 1 tsp cinnamon

  • 3 eggs, beaten

  • 1 cup plain yogurt (Greek or regular)

  • ¾ c milk + some to thin the batter

  • 1 ½ cups pumpkin puree

Allow for at least an hour for the whole grain to absorb liquid before cooking the pancakes. I have made the batter the night before and the before work in the morning for dinner pancakes and they turn out beautifully.

Combine dry ingredients and mix well. Combine all wet ingredients in a separate bowl and blend. Add wet ingredients to dry and mix until everything is evenly incorporated.

Let batter rest in the refrigerator to allow the whole grain to absorb. The top of the batter will oxidize a bit (turns brown) just mix it in, it’s no big deal.

Thin absorbed batter with additional milk to the consistency you like for pancake batter.

Heat your griddle to 300-325 or medium. These babies need to cook low and slow because they are so moist. Cook 3-5 minutes per side. The center will bounce back (like when testing a muffin for doneness) when they are cooked through.

If desired, add chocolate chips and pecans or walnuts as they are cooking. Top with butter and real maple syrup.

Makes about 24 four inch pancakes per batch.

You might wonder how these beauties fare on the picky scale. They are 4 out of 5 at our house, the oldest picky kiddo thought she had been poisoned when presented dinner last night. She had to forage for dinner on her own out of the fridge.

Enjoy Pumpkin Spice Season!

Brooke

Garlic - 3 Nifty Facts, Simple Recipe and Growing Your Own

Ahht, ahhht, ahhh isn't garlic the best! I use it all the time and love how it bring the flavors of food together.

1. Garlic contains two well known phytochemicals, allicin and ajoene. Allicin, responsible for it's distinctive aroma, is released as soon as you bruise the clove. The more bruising and cutting the more allicin gets released. It's this compound that may lower cholesterol, blood pressure and the risk of stomach cancer.  Ajoene is responsible for garlic's ability to make blood platelets less sticky. Completely cool that those small little things can be so powerful!

2. Garlic dates back over 6,000 years native to central Asia. Used widely in the Mediterranean, it was also so coveted it was found in King Tut's tomb in Egypt. It's also known to ward off vampires and equally as powerful,  lesson the symptoms and duration of the common cold.

Occasionally, my hubby will enjoy lunch at a Mongolian stir fry place. Upon entering the house he is detected at first wiff and risks sleeping outside if his scoop of garlic was too heavy handed. I LOVE garlic but not as a body spray. 

3. In the spring, foodie snobs can find garlic spears or garlic scapes at the farmers market. Genius on the part of the farmer or you if you grow your own. Instead of letting the bulb go to flower, and discarding the stem and spear when you harvest the cloves, you eat it! Simply cut the spears and roast (see pintrest) or sauté with other veggies.  

We saw these at Pikes Place in Seattle this past June. Totally unusual and totally cool!


SIMPLE BRUSCHETTA with GARLIC

  • 1  garlic clove crushed and finely minced
  • 4-5 tomatoes, diced (seeded if seeds bother you)
  • 5-10 basil leaves chopped
  • tiny bit of salt
  • 1 Tbsp olive oil (or more to taste)
  • 1 Tbsp balsamic vinegar (or more to taste)

If these ingredients are handy they only elevate the level of deliciousness:

  • artichoke hearts (packed in water) - diced
  • hearts of palm (packed in water) - diced
  • fresh mozzarella - diced
  • cucumber - diced

Mix and let merry for flavors to blend at least 30 minutes prior to digging in. If you want extra garlic goodness, rub a clove of raw garlic atop your piece of toasted bread...BAM! Goodness is waiting for you to enjoy.

I usually make this when I can grab crusty artisan bread off of the bakery 'day old' racks.

GROW YOUR OWN GARLIC

Garlic is a crop you actually plant in the fall.  Growing you own garlic is easy peasy.

  1. Buy an extra head (or several) of garlic at the garden center, farmers market or grocery store.
  2. Break a head of garlic into cloves, keeping the papery skin attached.
  3. Plant NOW - it's something you plant in the fall - garlic cloves about 1 inch deep in loose, healthy soil. Space cloves 4-6 inches apart in all directions.
  4. Water occasionally until the snow comes and harvest mid to late spring. When the tops start to dry up you know they are ready to pull from the ground. 
  5. Remove from the soil and dry for a few weeks. Mine dry on an old plastic sled in the garage. Knock the dry dirt off and rub loose skins off. Store in a cool dry place for your own garlic all winter long!

Happy Learning, Eating and Growing!

Brooke


Blend This Ingredient You Normally Toss

We drink some funny things in our fruit and veggie smoothies each day. Especially when you compare what is in our glass to what you might buy at smoothie or juice chain stores.

I had a friend text me a picture and a smoothie recipe and at first I thought she was joking. No way, really? Instead of composting or chucking this often discarded veggie scrap, she blends it.

Put on you big kid pants because this one isn’t normal.

Carrot tops.

Yep, the green thing that grows above the soil attached to the orange root veggie growing below.

My friend bagged and froze her carrot tops this past weekend and her smoothie recipe is as follows:

Purple Pine Green Smoothie

  • 2-3 carrot tops
  • 2 cups mixed frozen fruit
  • 2 cups mixed frozen berries
  • chia seeds
  • 1 cup peach yogurt

Blend until smooth.  *****Tastes like a pine tree, very Christmas-like*****

Of course I had to try it. I LOVE the idea of using something commonly tossed!!! Admittedly I was struggling to wrap my head around the taste. I am not a fan of parsley and carrot tops have a similar flavor but I was hopeful.

My recipe went something like this:

20150921_171254_HDR.jpg

Carrot Top Smoothie (makes 5-ish cups)

  • 1 banana
  • 1 cup zucchini
  • 1 cup blackberries
  • 1 peach
  • 1 carrot
  • 1 carrot top (not quite as brave as my friend)
  • 1 tomato
  • 1 cup homemade milk kefir

….aaaaand, it wasn’t nasty. It did havea strong carrot flavor and one of my kids who hates carrots wondered out loud (several times) why it tasted so much like carrots. She might have pulled a gaggy face or two as well.

I liked it.

Hubby didn’t complain – he doesn’t anyway, he quit tasting my smoothies long ago and chugs them down regardless of the brew. Occasionally, he will shudder and wince but he doesn’t verbalize his dismay.

My other two minions even swallowed  them down without any regurgitation.

Here is the best part, AFTER drinking the carrot top smoothie, I googled it to see if they were poisonous. Good news they aren’t.

People actually eat carrot tops on purpose and there are recipes online that will prove this point. They haven’t died yet either.

Think green leafy veggie = phytonutrients, vitamins, minerals, fiber  and using something you would normally toss.

Genius even if it is a little strange…like us.

Happy Blending!
Brooke

PS If YOU have something unusual, wacky or weird that you love to blend, TELL ME!!!! I live for this stuff and would love to hear about it!!!

PPS The FAM still doesn’t know what they drank that day, if you see them don’t tell them, it only makes them nervous when it’s smoothie time.

Back to School Boogers?

Man oh man do I feel defeated. The back to school germs hit us with a vengeance and honestly, I am a bit irritated.

After posting the back to school fruit and veggie smoothie with immunity booster, blabbing on about vitamin D and omega 3 fatty acids its still wasn’t enough to keep those germs away.

Three weeks into a new school year and my 3 kiddos have collectively missed 5 days of school.  Painful strep, thick goopy pink eye, bulging ear infections and dense boogery colds kept them home.

Three weeks into the new school year 2 of my kiddos on antibiotics. Ahhhhhhh!

We are also ever appreciative of the rebound cold picked up as soon as the course of antibiotics was over.

In reality, they are kids. They get sick, it’s how they build immunity.

According to the CDC, elementary kids get 8-12 colds or cases of flu every year.  Older kids get about ½ that.  Washing hands frequently, plenty of sleep, exercise and eating healthy are the best ways to combat these numbers.

Super -  but that isn’t good enough.  Back to school boogers have driven me to start something new. The last several weeks I have been working on my own homebrew to improve our chances staying in school.

No, this isn’t something fruity, mixed with yeast brewing in a dark corner.

It’s kefir. I’m making my own and it goes into our smoothies each night.

Why?

Cultures have been fermenting  food for eons as a method of preservation. Milk kefir hails from the Black Sea region and was fermented traditionally in a repurposed animal stomach. Nifty!

I bought my grains on amazon.com and I also ordered a fine mesh nylon sieve so I could strain my brew each day.

Kefir grains (symbiotic yeast and bacteria) eat the lactose in the milk and the end product is a slightly sour, full of excellent bacteria beverage.

What is it?

Fermented milk, with a buttermilk consistency. It’s packed with literally gazillions of beneficial bacteria that actually colonize in your gut competing with the bad bacteria. When good bacteria outnumber bad bacteria your chances of getting sick go waaaaay down.


Worth the bother?

Kefir grains (they have nothing to do with grain though) + a nylon fine mesh sieve = $6. One bottle kefir at the grocery store = $3.50. I have math skills, smoothie skills and now kefir skills.

I make my own kefir with kefir grains that will last indefinitely and we can have kefir every day for a fraction of the cost. And when the grains grow too big for my needs, I can share them!

Each night we add 1 cup of kefir to our smoothies. Purchasing kefir at the store, would run me about $7 a week for just that one ingredient. Ummm, no thanks. That is why WE work OUR cans off freezing hundreds of pounds of produce each year.

How does it taste?

Plain – it’s sour milk and one would have to be quite bold just to chug it straight. Mixed in a smoothie it’s totally delicious.

Our fruit and veggie smoothies actually taste better with kefir - the kids will even admit it. For lack of a better way to describe it, it “softens” the flavor.

Case in point. My son has a super picky friend who was over just as our dinner smoothie was blended and I had extra. I asked him if he wanted some and he looked at me with leary eyes and slowly said, “shhuuuure.” It helped that another neighbor buddy was also in the room and he cheered at the offer of a smoothie.

Picky neighbor, slammed the first glass and started LICKING it out. I refilled his cup and he gulped it down again and licked it out AGAIN. AWESOME! His mom called it a miracle, especially when she learned what was actually in it that day (kefir, blackberries, peach, carrots, kale, tomato, zucchini and a few apricots).

How do you do it?

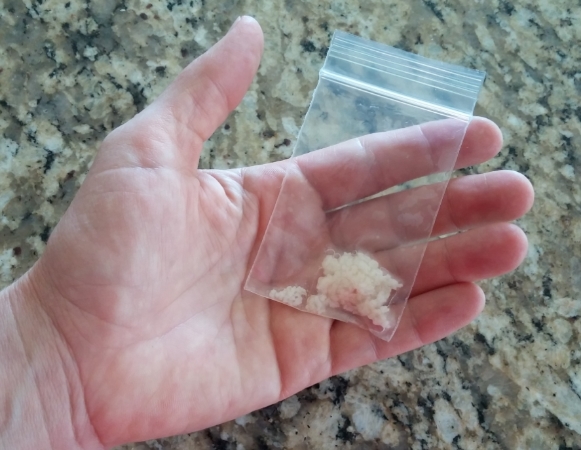
Watch a few youtube’s to get the feel for it then just jump in. My teaspoon of grains that I received in a tiny packet is the perfect amount to ferment 1 cup of milk. It takes some trial and error but I know a few things now.

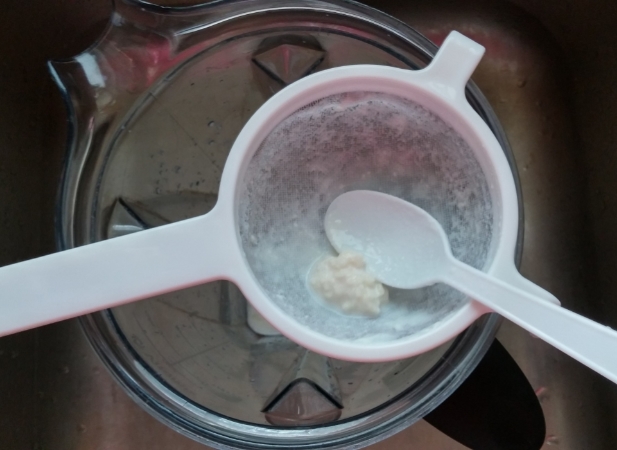
If your kefir looks like this:


It will taste the way toddler milk throw-up smells. Ewwww!

You CAN drink it but it WILL make you gurgle and perhaps splat which can be dangerous in certain social situations, especially work. Really though, DON’T DRINK IT. But do run it though you sieve to save the grains to start a new batch.

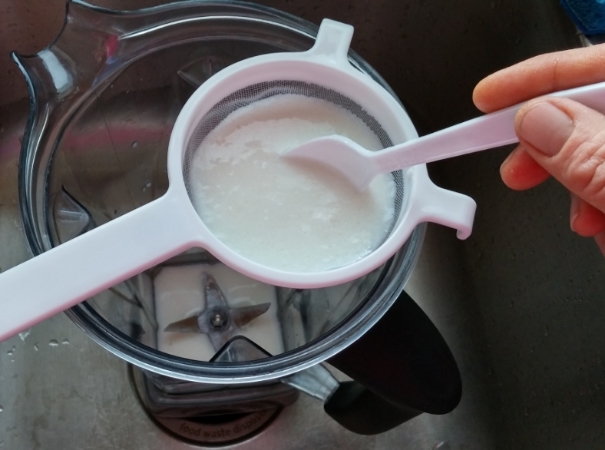
It should look like this:


A little bubbly, thick like buttermilk. But NOT separated into curds and whey.

After chucking several batches I finally figured it out:

  • one cup of milk and 1 tsp of kefir grains will ferment in about 12 hours when our house it kept at 72-76 degrees
  • strain it directly into the blender for your fruit and veggie smoothie at night
  • start a fresh batch (add 1 cup of milk to the strained grains) and leave on the counter until bedtime
  • put the kefir in the fridge when you go to bed
  • In the morning, take it out of the fridge, cover it with a towel and by 5 pm-ish  it will be ready to add to your smoothie
  • If I know we won’t be having a smoothie a particular night I simply get it to the kefir thickness I want then put it in the fridge. It will slow down and hold for a few days just fine.

Brewing your own makes adding a super powerful probiotic to your daily routine affordable. It improves the taste of your smoothies and will hopefully help your kids recover faster from the back to school goop and keep them in school for more days this year! I know my fingers are crossed!!!

Happy Brewing!

Brooke

Taco Tuesday with a Simple HealthyTwist

Who doesn’t love Taco Tuesday? Taco Tuesday is a meal the whole family will eat and be happy about eating.

Empowerment is probably the biggest reason why taco’s are met with so much appreciation. You put whatever you want on your taco.

  1. Immediate buy in – CHECK.
  2. Most of the food gets eaten- CHECK
  3. Healthy and satisfying – CHECK
  4. Delicious - CHECK

Olives, shredded cheese, diced tomatoes, black beans, refried beans, sour cream, avocado, salsa, crisp lettuce or fresh spinach topped with seasoned meat and whammo – a tasty dinner is served.  We also love diced sautéed summer squash with our tacos.
 

Still all the same old taco stuff right down to the ground beef or turkey sautéing up in a pan. Sprinkle it with taco seasoning.

This my friends is where the simple healthy twist comes into play.

Rather than paying about a buck for a pre-packaged taco seasoning mix, consider making your own. We have done this for several years now and I will NEVER go back.

Your homemade version will be less expensive, just as convenient AND BETTER FOR YOU!

The one you make will have no maltodextrin (sugar) used as a flowing agent to get the spices out of the machine and into the packet. It will also have almost NO sodium.

Why should I care about how much sodium I eat?

We eat too much but that isn't new news. It’s in virtually everything we purchase that has been processed in anyway. Not just chips, bouillon, canned soups and lunch meat but breads, cereals and almost every other thing that comes out of a box or a wrapper.

Salt is an incredibly cheap ingredient manufactures to add to foods because it acts as a preservative and it enhances flavor. However, too much is not good for you.

Eating too much sodium (sodium is in salt) can increase your risk of heart disease, it might increase your blood pressure and if you have congestive heart failure, cirrhosis of the liver or kidney disease it can lead to a build up a fluid which makes breathing difficult, moving difficult and living difficult.

Decreasing your sodium intake on Taco Tuesday just got simple.

You can do it a tablespoon at a time or a pint jar at a time. Here is how simple it is

TACO SEASONING

  • Chili Powder
  • Cumin
  • Garlic Powder
  • Onion Powder

Equal parts of each and you have your taco seasoning blend. Sprinkle liberally over you meat as it's browning. THAT’s IT! Unused seasoning can be stored in a glass jar with the lid tightly closed.

I buy the cheapo“5th Season” brand on the bottom shelf at the grocery store. Each bottle costs me 88¢ and will make about 12 ounces of taco seasoning for about $3.50 (30¢ per ounce) with 1/3 the sodium. One packet of prepackaged stuff will run you about $1 per ounce and have 2/3 more salt.

Taco Tuesday with a simple healthy twist is a way to enjoy a meal your family loves, save money and enjoy a healthier dinner with less sodium.

Whole foods, whole grains and simple ingredients you can pronounce while eating more produce will guarantee you several things.

You will feel awesome.

You will look awesome.

You will help others feel and look more awesome when you teach them your secrets.

Have an AWESOME Taco Tuesday!

Brooke

Confessions of a Coconut Oil Rookie

Peek into my clothes closet, it would be tough to accuse me of being trendy. 

A few years ago I became like that with food too. Sick of the expensive trends, ingredients promising to rule the world, the diet of the day, etc. I rolled my eyes over the hype of coconut oil and didn't bother digging any deeper because I was so tired of the "latest" super power food.

I drew the line until this weekend and in a weak moment I cracked. Hard. At Costco.

Coconut Oil is what broke me. I have been holding out for what feels like years with this trend. Really truly, it was because of the cost as much as it was the trend.

Skylander Giants figure Double Trouble, a magic power. Cleary I was lured in with powers as strong as magic to buy this!

Skylander Giants figure Double Trouble, a magic power. Cleary I was lured in with powers as strong as magic to buy this!

$25 for twins wrapped snugly together with a band of shrink wrap piled with their buddies prominently on an end cap pallet.  It’s organic and kosher. Big Deal. Blinders on and keep on walking...for years.

One 48 oz bottle of canola oil adds about $2.50 to the grocery tab. I prefer canola oil math to coconut oil math. BUT canola oil is made mostly with round-up ready GMO rapeseed. AND it's heavily processed with harsh chemicals. Maybe I need to re-think my math.

Possessed by demons? Maybe. I started to dig deeper into this fascination with coconut oil. I did what anyone else would do, I asked my family what they thought.

Consulting my mother in law and sister in law this weekend each one exclaimed wide eyed and with conviction how much they loved it. Ok, my sister in law has gorgeous huge eyes anyway, I was just adding drama.

WHY?

It all comes down to processing and Medium Chain Triglycerides.

PROCESSING - the label states it's cold pressed and not chemically treated during production. Very cool. Very much an unadulterated whole food which is my language.

MEDIUM CHAIN TRIGLYCERIDES. DON'T FALL ASLEEP, this is not Chemistry Class anymore. These babies are super cool because they aren't stored immediately as fat as other fats are. They are metabolized in the liver the first time through which means they are used as ENERGY fueling our cells immediately. SUPER COOL! Fat not stored as fat as long as you are moving enough to burn the calories you are consuming.


HOW?

Asking my family how they use coconut oil, this is what they shared.

  • Melt a tiny bit on air popped popcorn and sprinkle with a tiny bit of salt
  • Sauté vegetables in the coconut oil
  • Grease the griddle before pouring on pancake batter
  • Smear on dry scaly skin
  • Antibacterial properties can be used to help treat skin infections

My resolve was that for $25 bucks per twin pack, I was going to use it in places where it matteredSmall amounts in food we eat regularly.

  • Melt in pan before scrambling eggs - will they taste like coconut eggs? ummm, not so sure that would be awesome
  • Definitely in the pan as we sauté summer squash (we eat squash about 5 times a week)
  • Use in place of canola in the homemade granola that I eat daily
  • Gussy up fancy popcorn for the kiddos parties with friends – air popped popcorn, COCONUT oil, salt, pepper and freshly grated parmesan cheese
  • Tried it in a pie crust for a pumpkin pie this weekend...still on the fence as to how much I liked the coconut flavor with pumpkin

The more I learn about this trend, the more excited I am becoming over this ingredient.

As I chew on deciding if this is something I will buy again, I wondered something. One could argue that the premise of Think Inside the Blender may be a trend too. Naaaw, on second thought I disagree. Trends are things that come and go.

We have focused on this way of eating - specifically with fruit and vegetable smoothies for over 4 years. Our trend of eating whole foods, whole grains, fruit and veggie smoothies, while eating as much as we can that has been home grown is now a lifestyle which elevates it from trend status.

Eating this way comes with no fancy package or marketing dollars from corporate giants. It is propelled instead by readers like you who have seen how eating this way makes a difference.

You feel better, your kids are healthier, you visit the doctor less, well-checks or annuals are met with good news most of the time.

Adding coconut oil will not change the foundation of how we eat, but adding and tweaking small things will strengthen our foundation. Maybe I will keep using it.

How do you use coconut oil? Please share your insight with me!

Happy Home Cooking!

Brooke

Too many Tomatoes? Solve Your Problem with This Recipe!

Tomato lover? Here's how you can tell.

  • You own and use wall-o-waters.
  • You may or may not admit to saving egg shells to add to your soil where you plant tomatoes.
  • You grow heirlooms for flavor adventure but know they take forever to ripen so you have hybrids too.
  • You have tried several types of cages and almost drooled when they finally started selling heavier gage wire cages in cute colors.
  • You don't buy store tomatoes.
  • You would rather NOT have a tomato than eat one that tastes like cardboard.

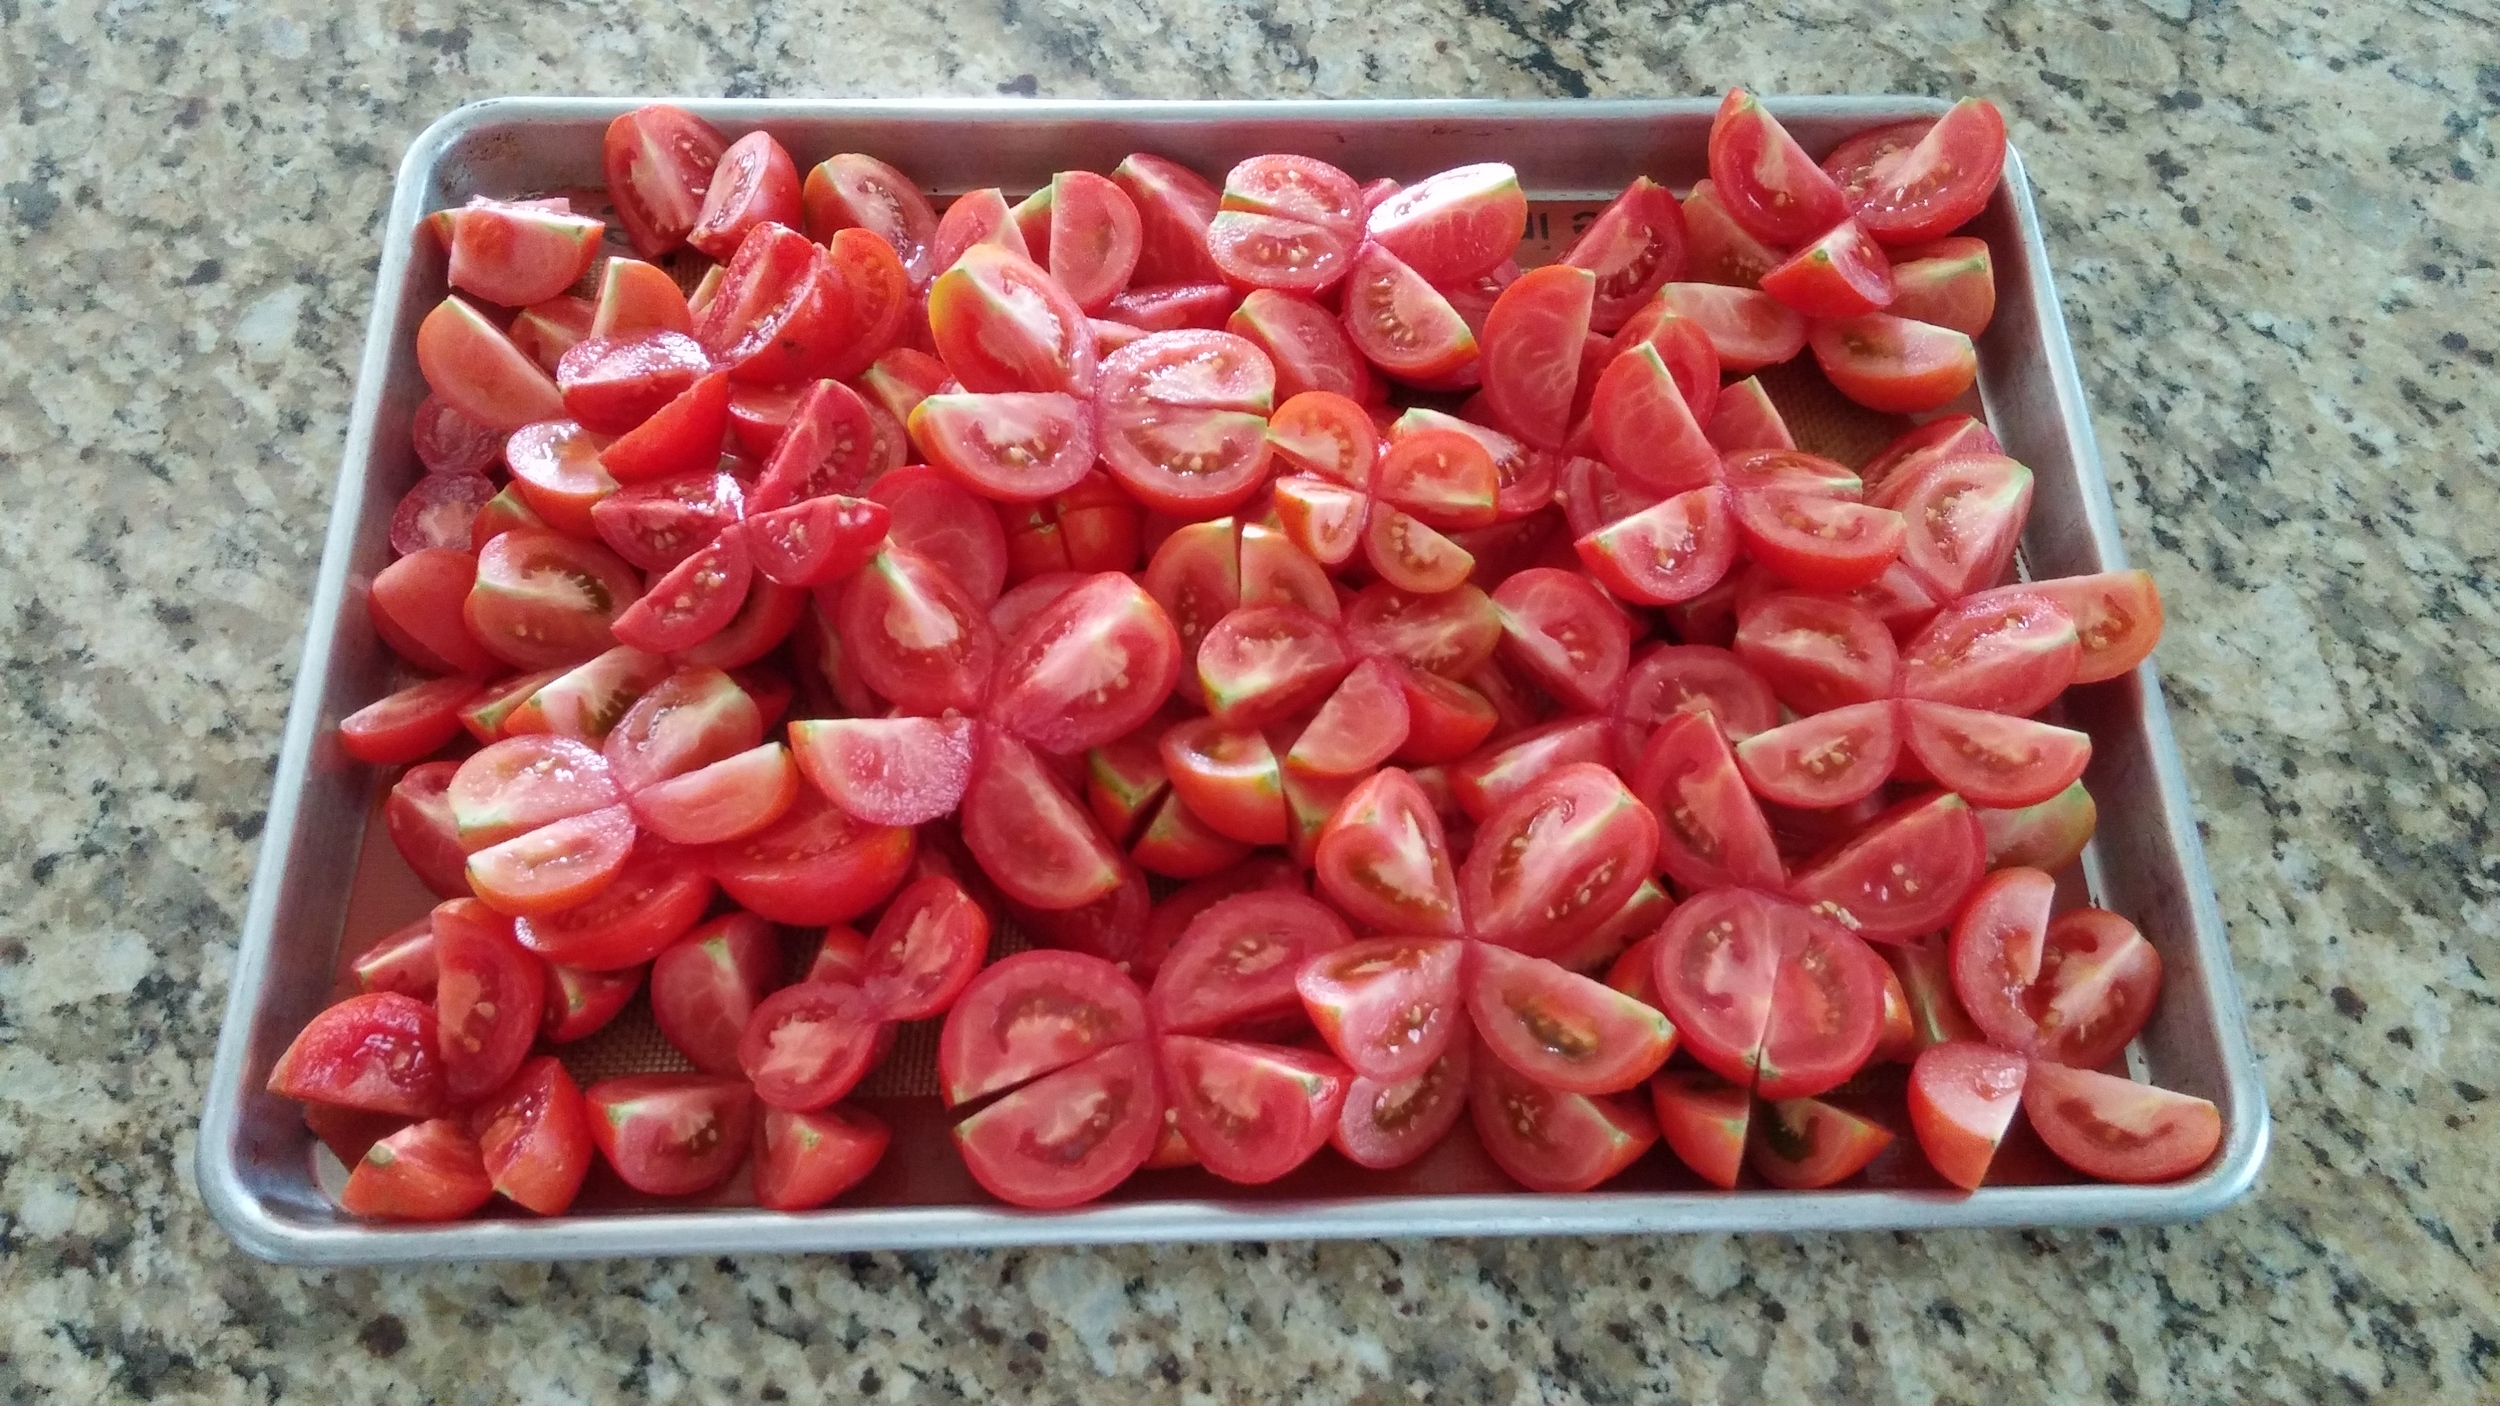
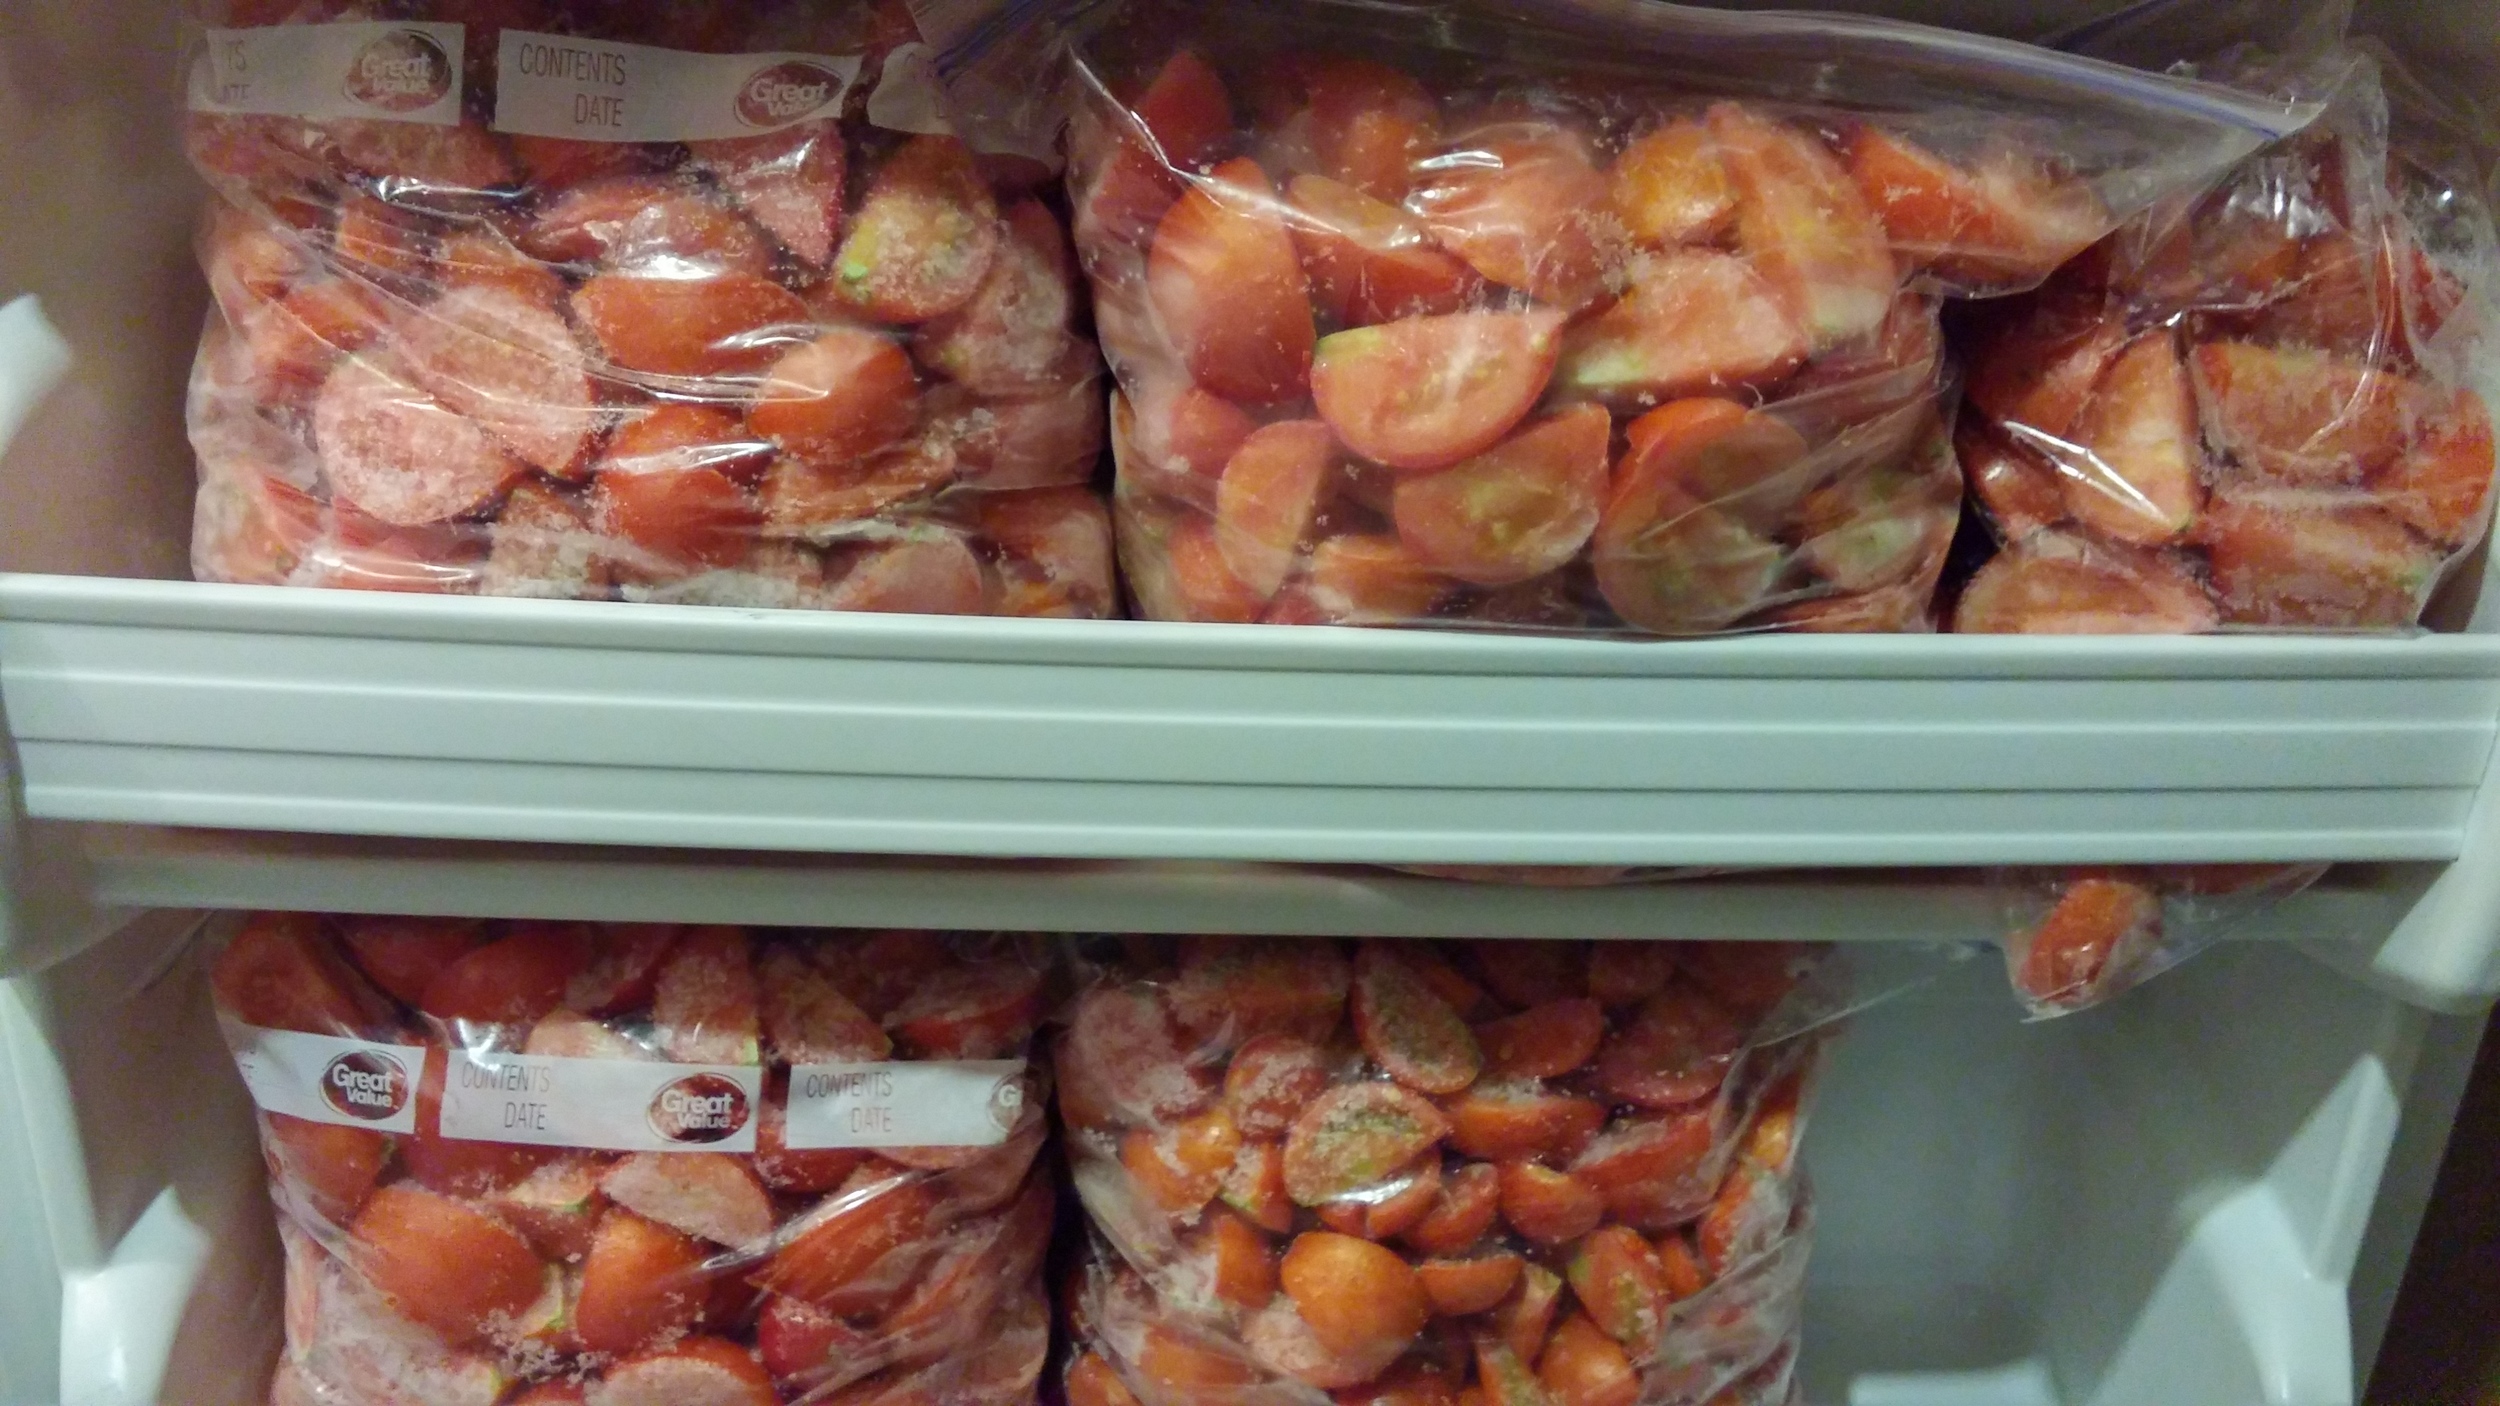
If you are overflowing with tomatoes it's time to FREEZE them. Yes, you know I am obsessed with freezing everything but this one is a no brainer. Quarter, (freeze on a silpat), pile and cram until your gallon bag is bulging. We use these frozen tomatoes several ways:

  • in our fruit and veggie smoothies
  • in tomato bisque soup
  • in tortilla soup (will post in a few weeks)

Today, I share with you my Tomato Bisque soup that can be made with fresh or frozen tomatoes.

Oh and if you were wondering if it were any good ... ALL 5 of us eat it. That says A LOT!

AND I served it to friends at a Christmas party last year.

DINNER GUEST WORTHY RECIPE!

Tomato Bisque

  • 8-10 cups quartered tomatoes
  • 1 large onion, sliced
  • 6-8 garlic cloves, peeled
  • 4 Tbsp butter
  • 4 Tbsp olive oil
  • 6-8 Tbsp whole wheat flour (white whole wheat or regular whole wheat)
  • 5 cups water
  • 5-8 Tbsp Bouillon ( I use the Organic Better than Bouillon Chicken Flavor)
  • 2 bay leaves
  • 1/4-1/2 tsp powdered thyme (or 2 fresh sprigs if you have it)

If using frozen tomatoes, set them out a few hours ahead of time. I just dump 1/2 a gallon sack into my 8 cup Pyrex mixing bowl. They need to be able to blend down and be smooth so you don't want them frozen solid. You can also thaw in the microwave and add some of the water (5 cups) it calls for toward the end of the recipe to thin them down so they can blend smoothly.

Blend 1/2 the tomatoes in your high powered blender until seeds are obliterated.

In a large saucepan or medium sized pot add butter and oil over medium heat. CAREFULLY add onion and garlic and sauté until soft and translucent.

Add 6-8 Tbsp whole wheat flour to onion mixture to form a roux. Cook for a minute, stirring constantly, to cook the raw flavor out of the flour.

Add roux to blender with 1/2 the tomatoes you all ready blended smooth. Blend mixture until smooth. It will take a minute or so on high to get the texture smooth and lovely. Add mixture back to the pot. Blend remaining tomatoes until smooth and add to your pot. Add water ( I measure with the tomatoey blender to rinse out the goodness into my pot not the sink), boullion, bay leaves and thyme. Let it simmer for 30 minutes. Remove bay leaves and fresh thyme (if you used it). ENJOY!!!!

Each packed 1 gallon bag makes 2 batches of soup.

We love tomato soup with grilled cheese. We discovered cutting the sandwich into soldiers (rectangles) made for a better dipping experience.

Freeze your tomatoes! Do it now and pack away as many as you can. 

Last year I froze about 15 gallons for our family. I only have 4 1/2 gallons as of today but give me a week or two and all I'll have my 15 gallon supply of tomatoes all nestled away in their icy tomb.

Stay tuned for a similar tomato based recipe for Tortilla Soup in a few weeks. Another awesome recipe to use up your tomatoes when the chill sets in!

Subscribe below so you don't miss the Tortilla Soup Recipe - it will go straight to your inbox!

Happy Freezing!

Brooke


Pumpkin Muffin Cooler Than Lunch Recess

It’s that time of year again. Besides being fall in just a few weeks, it’s when lunches we pack our kids COMPETE with recess. Only the easiest and most delicious things get eaten first while the rest is trashed or left to decompose in the lunch box.

Unless your school is smart enough to have recess first. Ours has lunch first - sigh. And I have a first grader and his first shot at all day school and lunch away from my visual supervision.

Time to pull out the big guns and compete in his lunchbox = awesome momma nutrition vs. the playground.

It is a slow process to ease things that are better for him into his lunch when his buddies have chips, fruit snacks, sugary pouch drinks and such.

Balance and patience is what it will take to get them to eat foods better for them when they are surrounded by lunch boxes filled with junk.

Let me be perfectly open about one thing. 2 of my kids get chocolate milk every day in their lunch boxes.

Gasp….shhh,  I don’t think chocolate milk is evil. This is why it goes in their lunch boxes:

  1. I know they will drink it
  2. calories – they needs them to be able to focus when it’s learning time. Hungry kids don’t learn well.
  3. decent amount of protein, vitamins and mineral – not straight juice with no protein to slow the insulin response
  4. I am not anti-dairy
  5. It’s delicious and convenient.  The end.

Chocolate milk confession aside, I’ve pulled out the big guns and am going muffin mode. They are the same shape as a cupcake so it has a coolness factor at the lunch table that makes it more desirable.

Muffins are a super amazing tricky way to sneak goodness and coolness into lunch without the kiddos realizing it.

The recipe today is for a whole grain pumpkin muffin. It’s sneaky awesome for a few reasons:

  1. It’s whole grain = AWESOME!

  2. It’s made with a veggie (shhh, kids don’t consider pumpkin a veggie)

  3. cupcake shape gives it a very high cool status rating

  4. moist and yet fluffy = easy to eat thereby improving chances that it will get eaten before the playground calls

  5. Pumpkin’s deep orange color means it’s loaded with carotenoids - phytochemicals that prevent free radicals from damaging cells. Who doesn’t need that when they are surrounded by 30 of their closest friends covered in contagious germs 6 hours a day, 5 days a week?

  6. Freeze well= super easy to pull out and add to lunches!

20150901_161627_HDR.jpg

Whole Grain Pumpkin Muffin

  • 1 ½ cups white whole wheat flour
  • 1 tsp baking soda
  • 1 tsp cinnamon (nutmeg and cloves to your liking too
  • 1/2 tsp salt
  • 1 cup pumpkin puree
  • 1 egg
  • ¼ cup sugar
  • 1 tsp vanilla
  • 1 Tbsp oil
  • ½ cup plain Greek yogurt
  • 1/3 cup milk
  • ½ cup chocolate chips (optional)

Blend dry ingredients. Put wet ingredients in a separate bowl and blend until smooth. Add wet ingredients to the dry and mix until just combined. Add chocolate chips and stir to combine. Bake at 350 for 20-25 minutes or until a toothpick comes out clean. Makes 12 muffins. Recipe doubles easily.

If you were wondering, this recipe is also very forgiving. I just made a batch and left out the oil and the milk and they are still fantastic.

Happy Baking!

Brooke

Using Your Garden to Help Pay for College Part 2

Part 2 of 2

Last post was all about how we use the garden to help pay for college.  This post shares more details on what  is in a box, the one “crop” you can grow (no, it’s not the green 5 leaf kind) if you don’t want to do weekly boxes, selling produce without a garden and how we trick the kiddos into getting a tangible feel for the cost of college.

WHAT IS IN A BOX?

My dad and I plan what each of us will grow to help maximize space and ensure we have new fun things as well as the standard things people love. Here is what you could find in a box of produce over the course of our season:

Radish (watermelon, French heirloom and icicle), kale (Italian black and curly leaf), green beans, broad Italian flat beans, Chinese long beans, collards, chard, garlic, onions,  shallots, zucchini, crook neck, alien and patty pan squash, blackberries, peaches, plums, apricots, granny smith apples, pears, rhubarb, grapes, cherry tomatoes, tomatoes (Celebrity, 4th of July, Beefeater, etc), heirloom tomatoes, beets, kohlrabi, cucumber (regular and lemon), chilies, sage, basil, rosemary, peppermint, summer savory, turnips, parsnips, green and red peppers, edamame, lima beans, yams, potatoes, Brussel’s sprouts, okra, peas (shelling and snap), fennel, eggplant (Japanese, white, Black Beauty) baby boo pumpkins, loofa (it’s a gourd) and I probably forgot something.

Over the years we have discovered that people love the standard things (tomatoes, green beans, squash and cucumbers) but they also love seeing new and different things too. White eggplant, kohlrabi and the loofa have been some of our favorite surprises to add to the boxes.

ONE CROP WONDER

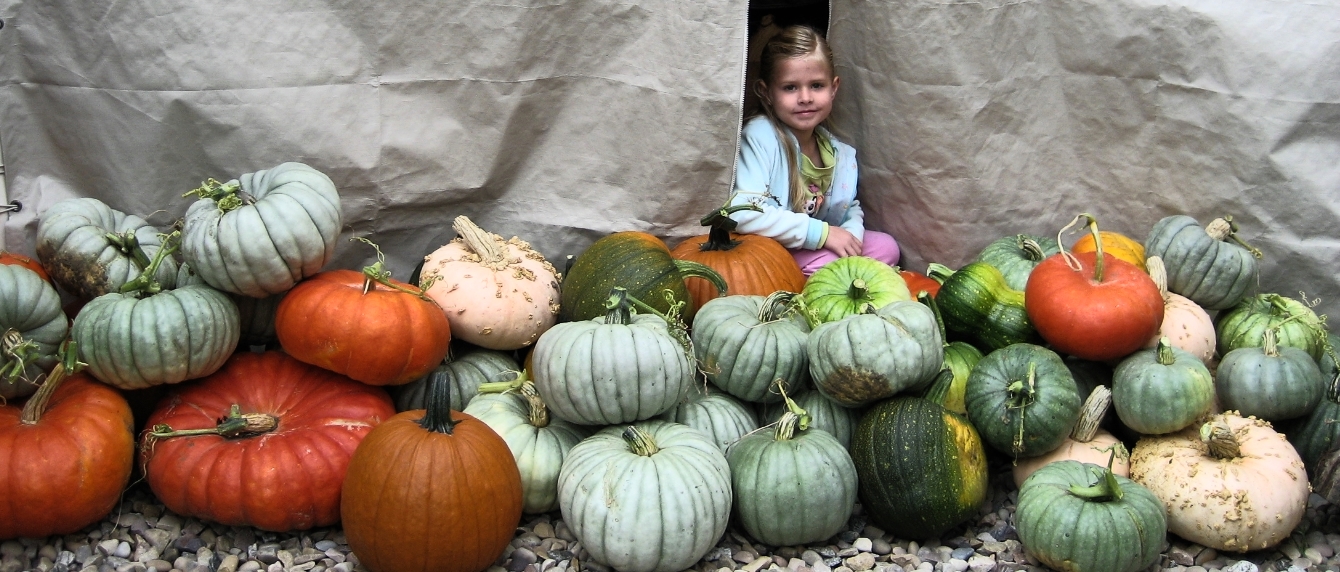
Pumpkins are a one crop wonder!

My oldest was about 5 when she asked from the backseat of the car one day, “Mom, what does it take to grow pumpkins? I replied, “seeds, sun and water.” She chewed on that answer for a minute then promptly added, “love, they also need love Mom.”

We haven’t done this for a few years because we don’t have the proper space. BUT for several years we grew super funky, exotic heirloom pumpkins. We used space at the neighbors, the in-laws and scattered them about our yard as well.

Pumpkins are “easy” because they don’t have to be babysat and picked weekly like other produce. Plant, water, fertilize, LOVE, pick and sell. The drawback, they take up a lot of space and need gobs of sunlight - if you have a shady lot...don't waste your time.

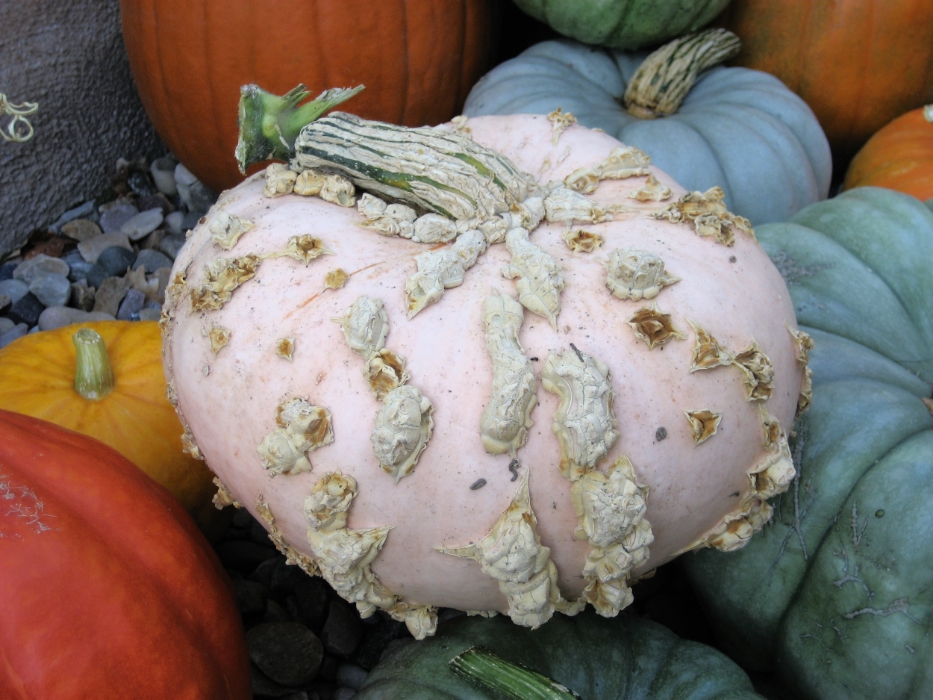
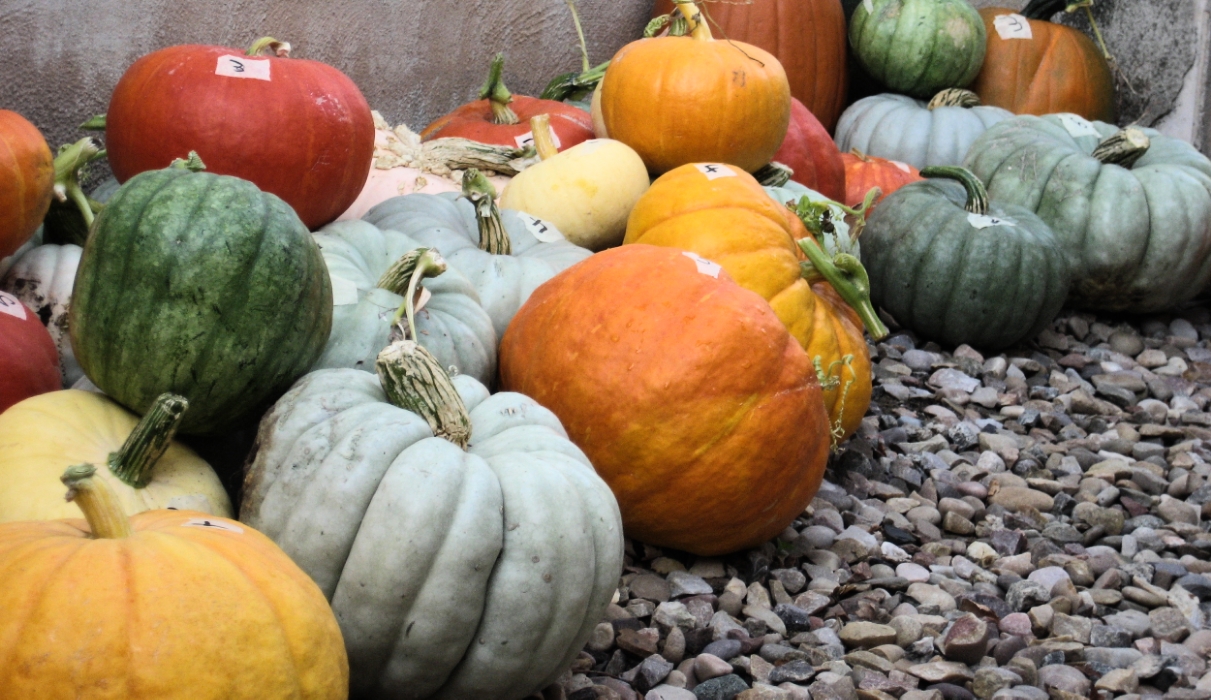
Cinderella’s, Galeux D’Eysines, Long Island Cheese, Triamble, Jarrahdale and others would add about $300 or more per year to the college pot. People love the weird ones but they like the classic Connecticut Field Pumpkin too.

My two favorite places to find unusual seeds:  Baker Creek Heirloom Seeds and rareseeds.com.

SELLING PRODUCE WITHOUT A GARDEN

Here are the deets on how to do help your kiddos earn moola with produce  when you don’t have a garden.

Google “how to start my own produce co-op” – I have participated in the winter months in a neighborhood co-op but haven’t orchestrated it first hand.

Google “local produce suppliers” and call them to see if they deliver to homes and what is the minimum order $ amount. You may also consider calling your grocery store produce manager to see what prices they would give on case quantities.

Request a sales sheet so you know the prices and quantities of the items they carry.

Pre-sale the boxes with neighborhood flyers and social media letting people how much a “basket” will be, how many times you will be doing it and WHY you are doing it. 

The local co-op my friend runs builds 24 baskets at $17 a basket –a smidge over $400 to place your order. You could easily charge $22 per basket and make a $5 profit on each basket - ear marked for vacation spending money or a starter college fund.

Although you will be doing the ordering and behind the scene orchestrating, the kiddos can be in charge of dividing the produce into equal amounts for your customers. They can even deliver them via a little red wagon if your customers are close enough.

TRICK THEM INTO GETTING A TANGIBLE FEEL FOR COLLEGE COSTS

Blah blah blah….college is expensive. Blah blah blah…save now...blah blah blah.

Each summer we reinforce that college IS expensive and that saving small amounts NOW adds up and will make a difference by visiting the Utah State University bookstore.

At the bookstore we play the game, “find the most expensive text book.”

Is it likely they will need Thermodynamics and are willing to shell out for the NEW book? Thermodynamics, maybe, daddy has one – brand NEW…nope, but it reinforces the point of picking, sweating, saving and planning. Book prices are outrageous and yes, I hope they have scheming skills enough to order online in advance but our point is well taken. College is expensive. Saving now matters because they have seen the price tag even if only on the books.

By the time the kiddos hit college we hope to have at least $10,000 in each of their accounts that they have earned one way or another. No, it won’t pay for everything but it will have laid an excellent foundation of hard work, commitment and follow-through especially when you really don’t want to do something (like pick prickly squash or itchy green beans).

Happy Growing!
Brooke