Why We Eat Spaceships with Tails - sprouting legumes and grains is worth it!

There is only so much time in a day, why on earth is sprouting legumes, grains or seeds a good idea?

Let me make myself perfectly clear. Sprouting takes less than 4 minutes of your time from start to finish. That 4 minutes will pay you back exponentially.

Exponential improvement in the health of you and your tribe allowing you to live and be your best!  A promise about soaking stuff in water first?  Yes indeed!

Sprouting is something I started doing to help our 15 year old daughter as she battles c diff colitis Remember the Big MAC diet post?

Microbiota Accessible Carbohydrates….these are the Big MAC’s we LOVE at our house. I add sprouted legumes to EVERYTHING and in so doing help our daughters gut heal while improving our own health.

They aren't just good for her, they are good for all of us! Our uber picky 8 year old almost died and refused to eat the "tail" the first time he saw sprouted lentils added to a burrito.  I laughed and told him, "dude, you need to eat the whole spaceship with the tail." Sold.

  • Legumes are packed with the fiber the critters in our intestines (gut microbiome) LOVE to eat. The equation is simple. High fiber foods = food for intestinal bacteria = stronger microbiome.
  • Fiber is what the critters in your gut eat. Well-fed gut critters = happy, healthy gut critters. Check.
  • Fiber keeps you full longer. Check.
  • Fiber saves you time sitting on the porcelain throne. Check.
  • Sprouting legumes prior to eating helps make them easier to digest (shhh this means less gas). Check.
  • Cheap plant based protein - 1/2 cup cooked lentils have 8 grams of protein. Double Check.
  • Dry legumes are super cheap. Less than $1 a pound at any grocery store. Last time I was at Costco, organic chicken was about $6 a pound. You have math skills too. Check.

Plenty of reasons to want to add legumes, grains and seeds to your diet but sprouting them first? Yes!!!

Sprouting – DISCLAIMER… if they smell weird, are slimy or moldy….DO NOT EAT THEM!!!!

If you have a mason jar you can do this. Nothing technical, nothing wacky.

Benefits of Sprouting

Complex carbohydrates are broken down into easier to digest carbohydrates = less gas.

Sprouting also allows for our body to absorb more nutrients = more vitamins and minerals to help the cells in our body fight and be its strongest.

If you are sprouting legumes or grains, they will cook faster. Check

Ever head of alkaline (plant based foods) vs acidic (sugar and heavily processed foods) foods? The more alkaline the better. Guess what, sprouting makes legumes, grains and seeds more alkaline which is SUPER AMAZING for our body!!!

If you are still reading, there is a chance you might try sprouting. Seriously it takes nothing fancy.

Here are the steps to sprout your own goodness:

  • Rinse 1 cup of lentils (legumes, grains or seeds)
  • Place rinsed lentils in a 1 qt mason jar
  • Fill jar to the shoulder with water and let it sit overnight or for about 12 hours
  • Use your fingers and hand as a colander (or cheese cloth secured with a ring) and drain water.
  • Prop jar on a towel at an angle to allow for drainage and air flow.
  • Rinse 2-3 times a day by filling the jar with fresh water and pouring it out again using your fingers and hand or cheesecloth  as a strainer. Continue to prop jar on a towel at an angle. Your sprouts are ready when they have ¼ inch “tails.” (After the overnight soak, it takes until about the end of the second day to get them to sprout.)
  • Place sprouted lentils in a medium saucepan and add water to cover plus an inch or so. Bring to a boil then cover with a lid and simmer for 15-20 min or until tender. Each legume or grain will have a different cooking time BUT it will be faster than a non-sprouted legume or grain.  Freeze extra in zip lock baggies, all ready portioned.

WHERE TO USE SPROUTED grains or legumes –

SALADS, SOUP, CASSEROLES, SCRAMBLED EGGS and add to meat dishes like tacos, shredded bbq. You name it and I will have been accused of adding lentils to it.

They are amazing in everything and with everything!!! There is also a really good chance you can get away with them added to brownies and cookies too. Shhhh!

Sign up so you don't miss a post. Like, follow, pin or comment - I would love to hear your questions so I know what to do to better help you understand easy, awesome ways to improve your health!

Brooke

FAST FOOD for Fall Part 1 of 3

Hey You Guys! (Think Goonies!)

Gotcha!  I have been AWOL for awhile BUT have not fallen off my rocker. This post is no ode to the deliciousness of Chick-Fil-A or McDonald's. We rarely eat at those joints because we hate how we feel after we are done noshing. I would bet you feel the same way but still need something as easy and convenient to turn to during those times you are caught in a meal crisis.

Perhaps you would like something easy, fast, affordable and good for you? We all do! Today I share my secret to keeping my family in as much fast food as they want. The only caveat is that this fast food comes from the freezer not a drive through.

The secret to fast food at our house is no longer a secret.  Cupcake tins, silicone cupcake liners (BPA free of course ;) and a freezer bag hold the key to easy, fast, affordable and good for you.

Make the grub, freeze the grub then enjoy your healthy grub when you are in a pickle. This works well for all sizes of families and even college students. Freezing portions of delicious food keeps it from spoiling, keeps you with good for you options and is super convenient.

Fast Food for fall!

Fast Food for fall!

I’ve been freezing food like this since college. I started with spaghetti sauce and this recipe for Calico Beans was the second one to do the cupcake tin routine. Love that silicone cupcake liners have been invented since then!

This recipe is incredibly flexible. It halves or doubles with no problems. It can be made vegan or carnivore. You can even leave out the sugar (I have done that but didn’t like it as much).

Calico Beans

Brown:

  • 5-6 strips of pre-cooked bacon- it will crisp up in the pot, don’t microwave it (optional)
  • 1 medium onion
  • 3 cloves garlic, minced (optional)
  • 1 pound hamburger, ground turkey or ground chicken (optional)

Add:

  • 2 (15 oz) cans kidney beans, drained and rinsed
  • 2 (15 oz) cans pinto beans, drained and rinsed
  • 2 (15 oz) cans great white (northern) beans, NOT drained and rinsed
  • 2 (15 oz) cans black beans, NOT drained and rinsed
  • 1 tbsp Tabasco or Franks Hot Sauce
  • 1 Tbsp dry mustard
  • 1 Tbsp white vinegar
  • ½ cup ketchup
  • ¼ cup sugar
  • 1 tsp salt

Water, add enough to bring the liquid level just below the below the top of the beans. Bring to a boil then turn it down to simmer for 1 – 1 ½ hours (stir occasionally)…if you have less time to let it simmer it’s fine too. It gets tastier as the flavors all meld together.

We eat with saltines, a string cheese and clementine’s or oranges. The vitamin C from the oranges helps your body absorb the iron from the beans and ground meat too.  Maybe that’s weird but it’s perfectly delicious. The kiddos eat it for breakfast, lunch and dinner.

Once it has cooled we scoop the leftovers into the silicone cupcake liners and freeze. Pop them out once they have frozen solid and store in a gallon bag.  FAST FOOD for fall AT YOUR FINGERTIPS!!!

Calico Beans - our fast food!

Calico Beans - our fast food!

Thanks for reading!

Best,

Brooke

Garlic - 3 Nifty Facts, Simple Recipe and Growing Your Own

Ahht, ahhht, ahhh isn't garlic the best! I use it all the time and love how it bring the flavors of food together.

1. Garlic contains two well known phytochemicals, allicin and ajoene. Allicin, responsible for it's distinctive aroma, is released as soon as you bruise the clove. The more bruising and cutting the more allicin gets released. It's this compound that may lower cholesterol, blood pressure and the risk of stomach cancer.  Ajoene is responsible for garlic's ability to make blood platelets less sticky. Completely cool that those small little things can be so powerful!

2. Garlic dates back over 6,000 years native to central Asia. Used widely in the Mediterranean, it was also so coveted it was found in King Tut's tomb in Egypt. It's also known to ward off vampires and equally as powerful,  lesson the symptoms and duration of the common cold.

Occasionally, my hubby will enjoy lunch at a Mongolian stir fry place. Upon entering the house he is detected at first wiff and risks sleeping outside if his scoop of garlic was too heavy handed. I LOVE garlic but not as a body spray. 

3. In the spring, foodie snobs can find garlic spears or garlic scapes at the farmers market. Genius on the part of the farmer or you if you grow your own. Instead of letting the bulb go to flower, and discarding the stem and spear when you harvest the cloves, you eat it! Simply cut the spears and roast (see pintrest) or sauté with other veggies.  

We saw these at Pikes Place in Seattle this past June. Totally unusual and totally cool!


SIMPLE BRUSCHETTA with GARLIC

  • 1  garlic clove crushed and finely minced
  • 4-5 tomatoes, diced (seeded if seeds bother you)
  • 5-10 basil leaves chopped
  • tiny bit of salt
  • 1 Tbsp olive oil (or more to taste)
  • 1 Tbsp balsamic vinegar (or more to taste)

If these ingredients are handy they only elevate the level of deliciousness:

  • artichoke hearts (packed in water) - diced
  • hearts of palm (packed in water) - diced
  • fresh mozzarella - diced
  • cucumber - diced

Mix and let merry for flavors to blend at least 30 minutes prior to digging in. If you want extra garlic goodness, rub a clove of raw garlic atop your piece of toasted bread...BAM! Goodness is waiting for you to enjoy.

I usually make this when I can grab crusty artisan bread off of the bakery 'day old' racks.

GROW YOUR OWN GARLIC

Garlic is a crop you actually plant in the fall.  Growing you own garlic is easy peasy.

  1. Buy an extra head (or several) of garlic at the garden center, farmers market or grocery store.
  2. Break a head of garlic into cloves, keeping the papery skin attached.
  3. Plant NOW - it's something you plant in the fall - garlic cloves about 1 inch deep in loose, healthy soil. Space cloves 4-6 inches apart in all directions.
  4. Water occasionally until the snow comes and harvest mid to late spring. When the tops start to dry up you know they are ready to pull from the ground. 
  5. Remove from the soil and dry for a few weeks. Mine dry on an old plastic sled in the garage. Knock the dry dirt off and rub loose skins off. Store in a cool dry place for your own garlic all winter long!

Happy Learning, Eating and Growing!

Brooke


Back to School Boogers?

Man oh man do I feel defeated. The back to school germs hit us with a vengeance and honestly, I am a bit irritated.

After posting the back to school fruit and veggie smoothie with immunity booster, blabbing on about vitamin D and omega 3 fatty acids its still wasn’t enough to keep those germs away.

Three weeks into a new school year and my 3 kiddos have collectively missed 5 days of school.  Painful strep, thick goopy pink eye, bulging ear infections and dense boogery colds kept them home.

Three weeks into the new school year 2 of my kiddos on antibiotics. Ahhhhhhh!

We are also ever appreciative of the rebound cold picked up as soon as the course of antibiotics was over.

In reality, they are kids. They get sick, it’s how they build immunity.

According to the CDC, elementary kids get 8-12 colds or cases of flu every year.  Older kids get about ½ that.  Washing hands frequently, plenty of sleep, exercise and eating healthy are the best ways to combat these numbers.

Super -  but that isn’t good enough.  Back to school boogers have driven me to start something new. The last several weeks I have been working on my own homebrew to improve our chances staying in school.

No, this isn’t something fruity, mixed with yeast brewing in a dark corner.

It’s kefir. I’m making my own and it goes into our smoothies each night.

Why?

Cultures have been fermenting  food for eons as a method of preservation. Milk kefir hails from the Black Sea region and was fermented traditionally in a repurposed animal stomach. Nifty!

I bought my grains on amazon.com and I also ordered a fine mesh nylon sieve so I could strain my brew each day.

Kefir grains (symbiotic yeast and bacteria) eat the lactose in the milk and the end product is a slightly sour, full of excellent bacteria beverage.

What is it?

Fermented milk, with a buttermilk consistency. It’s packed with literally gazillions of beneficial bacteria that actually colonize in your gut competing with the bad bacteria. When good bacteria outnumber bad bacteria your chances of getting sick go waaaaay down.


Worth the bother?

Kefir grains (they have nothing to do with grain though) + a nylon fine mesh sieve = $6. One bottle kefir at the grocery store = $3.50. I have math skills, smoothie skills and now kefir skills.

I make my own kefir with kefir grains that will last indefinitely and we can have kefir every day for a fraction of the cost. And when the grains grow too big for my needs, I can share them!

Each night we add 1 cup of kefir to our smoothies. Purchasing kefir at the store, would run me about $7 a week for just that one ingredient. Ummm, no thanks. That is why WE work OUR cans off freezing hundreds of pounds of produce each year.

How does it taste?

Plain – it’s sour milk and one would have to be quite bold just to chug it straight. Mixed in a smoothie it’s totally delicious.

Our fruit and veggie smoothies actually taste better with kefir - the kids will even admit it. For lack of a better way to describe it, it “softens” the flavor.

Case in point. My son has a super picky friend who was over just as our dinner smoothie was blended and I had extra. I asked him if he wanted some and he looked at me with leary eyes and slowly said, “shhuuuure.” It helped that another neighbor buddy was also in the room and he cheered at the offer of a smoothie.

Picky neighbor, slammed the first glass and started LICKING it out. I refilled his cup and he gulped it down again and licked it out AGAIN. AWESOME! His mom called it a miracle, especially when she learned what was actually in it that day (kefir, blackberries, peach, carrots, kale, tomato, zucchini and a few apricots).

How do you do it?

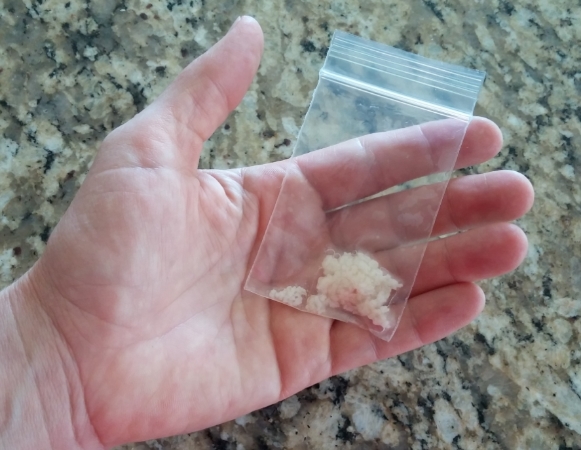
Watch a few youtube’s to get the feel for it then just jump in. My teaspoon of grains that I received in a tiny packet is the perfect amount to ferment 1 cup of milk. It takes some trial and error but I know a few things now.

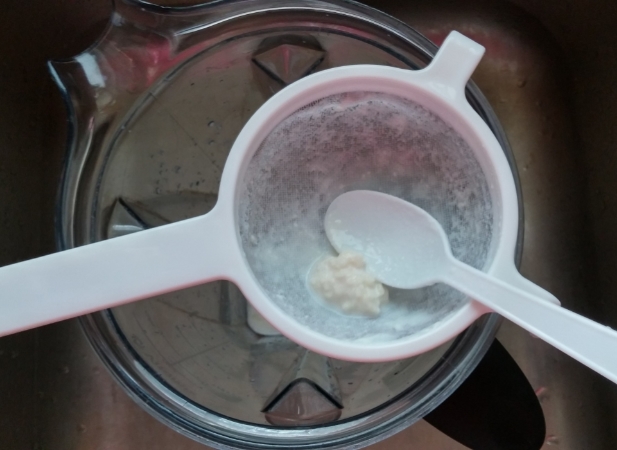
If your kefir looks like this:


It will taste the way toddler milk throw-up smells. Ewwww!

You CAN drink it but it WILL make you gurgle and perhaps splat which can be dangerous in certain social situations, especially work. Really though, DON’T DRINK IT. But do run it though you sieve to save the grains to start a new batch.

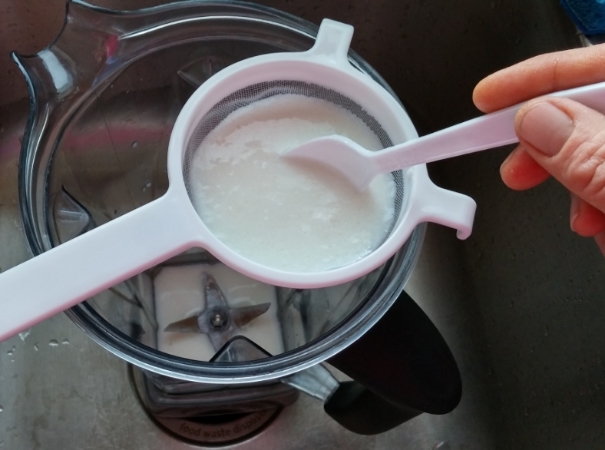
It should look like this:


A little bubbly, thick like buttermilk. But NOT separated into curds and whey.

After chucking several batches I finally figured it out:

  • one cup of milk and 1 tsp of kefir grains will ferment in about 12 hours when our house it kept at 72-76 degrees
  • strain it directly into the blender for your fruit and veggie smoothie at night
  • start a fresh batch (add 1 cup of milk to the strained grains) and leave on the counter until bedtime
  • put the kefir in the fridge when you go to bed
  • In the morning, take it out of the fridge, cover it with a towel and by 5 pm-ish  it will be ready to add to your smoothie
  • If I know we won’t be having a smoothie a particular night I simply get it to the kefir thickness I want then put it in the fridge. It will slow down and hold for a few days just fine.

Brewing your own makes adding a super powerful probiotic to your daily routine affordable. It improves the taste of your smoothies and will hopefully help your kids recover faster from the back to school goop and keep them in school for more days this year! I know my fingers are crossed!!!

Happy Brewing!

Brooke

Pumpkin Muffin Cooler Than Lunch Recess

It’s that time of year again. Besides being fall in just a few weeks, it’s when lunches we pack our kids COMPETE with recess. Only the easiest and most delicious things get eaten first while the rest is trashed or left to decompose in the lunch box.

Unless your school is smart enough to have recess first. Ours has lunch first - sigh. And I have a first grader and his first shot at all day school and lunch away from my visual supervision.

Time to pull out the big guns and compete in his lunchbox = awesome momma nutrition vs. the playground.

It is a slow process to ease things that are better for him into his lunch when his buddies have chips, fruit snacks, sugary pouch drinks and such.

Balance and patience is what it will take to get them to eat foods better for them when they are surrounded by lunch boxes filled with junk.

Let me be perfectly open about one thing. 2 of my kids get chocolate milk every day in their lunch boxes.

Gasp….shhh,  I don’t think chocolate milk is evil. This is why it goes in their lunch boxes:

  1. I know they will drink it
  2. calories – they needs them to be able to focus when it’s learning time. Hungry kids don’t learn well.
  3. decent amount of protein, vitamins and mineral – not straight juice with no protein to slow the insulin response
  4. I am not anti-dairy
  5. It’s delicious and convenient.  The end.

Chocolate milk confession aside, I’ve pulled out the big guns and am going muffin mode. They are the same shape as a cupcake so it has a coolness factor at the lunch table that makes it more desirable.

Muffins are a super amazing tricky way to sneak goodness and coolness into lunch without the kiddos realizing it.

The recipe today is for a whole grain pumpkin muffin. It’s sneaky awesome for a few reasons:

  1. It’s whole grain = AWESOME!

  2. It’s made with a veggie (shhh, kids don’t consider pumpkin a veggie)

  3. cupcake shape gives it a very high cool status rating

  4. moist and yet fluffy = easy to eat thereby improving chances that it will get eaten before the playground calls

  5. Pumpkin’s deep orange color means it’s loaded with carotenoids - phytochemicals that prevent free radicals from damaging cells. Who doesn’t need that when they are surrounded by 30 of their closest friends covered in contagious germs 6 hours a day, 5 days a week?

  6. Freeze well= super easy to pull out and add to lunches!

20150901_161627_HDR.jpg

Whole Grain Pumpkin Muffin

  • 1 ½ cups white whole wheat flour
  • 1 tsp baking soda
  • 1 tsp cinnamon (nutmeg and cloves to your liking too
  • 1/2 tsp salt
  • 1 cup pumpkin puree
  • 1 egg
  • ¼ cup sugar
  • 1 tsp vanilla
  • 1 Tbsp oil
  • ½ cup plain Greek yogurt
  • 1/3 cup milk
  • ½ cup chocolate chips (optional)

Blend dry ingredients. Put wet ingredients in a separate bowl and blend until smooth. Add wet ingredients to the dry and mix until just combined. Add chocolate chips and stir to combine. Bake at 350 for 20-25 minutes or until a toothpick comes out clean. Makes 12 muffins. Recipe doubles easily.

If you were wondering, this recipe is also very forgiving. I just made a batch and left out the oil and the milk and they are still fantastic.

Happy Baking!

Brooke